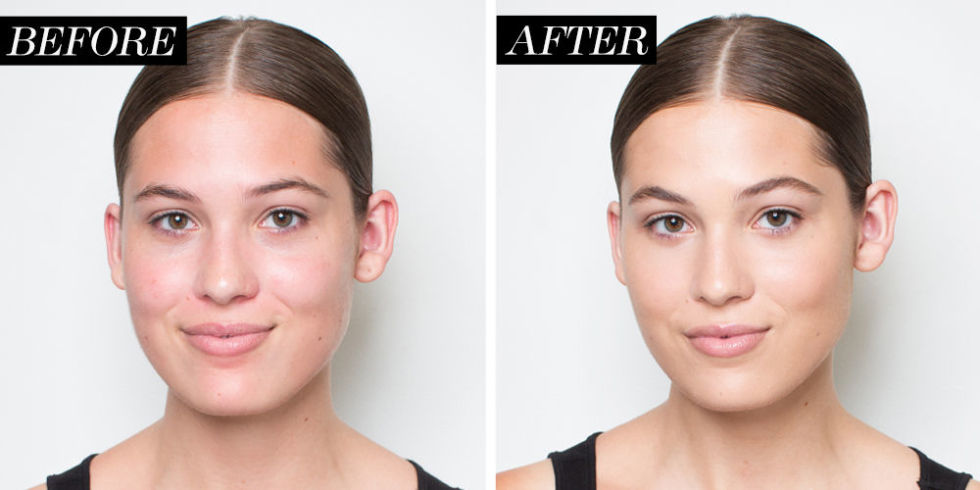
 Hello everyone on week 235 we are sharing Tips, videos on what makeup foundations is, what it does and how to selective one that suits you best.
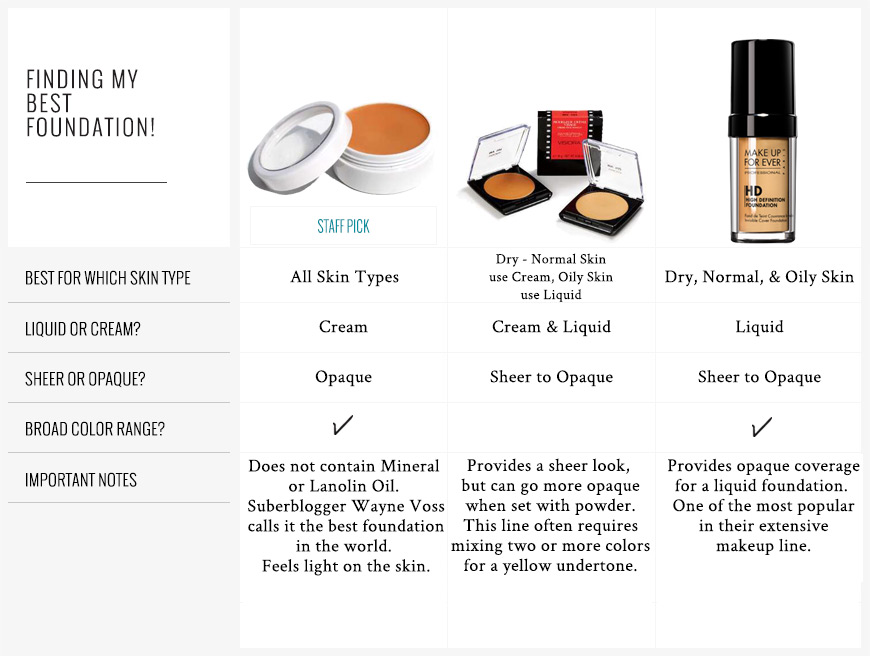
Through the years that I have worked as a makeup artist I got to try hundreds of different foundations, and I, like many other artists, have my favorite one in particular and that is RCMA, from the Research Council of Make Up Artist. I have worked all over the world with different lights, different shades of skin and always RCMA worked perfection. I have used it in photo shoots in the water for commercials such as Victoria Secret and much more. The models were in salt water for hours and it didn’t move at all. Okay enough of my preference on foundation I just thought I would give them recognition since their products have helped me for close to 40 years.
Foundation is our canvas, so it is best to invest the time trying what is the best match for you. Today’s foundation is multipurpose, offering far more than color correction and coverage, with built-in sun protection, moisturizer, and many with vitamins and claimed anti-aging formulas. For the most part the claim is that they allow the skin to breathe and look “NATURAL” that is the case if we apply a good light moisturizer that has SPF build into it so we don’t apply too many coats that may not get along and make the foundation look unnatural, to say the least. Blending is the secret to a good foundation finish, aside from choosing the foundation that matches your undertone color and there is the key to a smooth transition from a foundation that glides on your skin and you can not tell the difference as it goes over because it MATCHES your underton., In certain cases some skin has two and sometimes three undertones and here is where you can use a concealer to even spot covering and apply your foundation once you have a more even canvas. Let’s keep in mind less is more here. Finesse is at work once you finish the overall look with the eye makeup and lips you can go over and tweak it so it doesn’t look cake and muddy and this will still allow the skin to breathe. Foundation aids with protecting the skin from the elements and environmental pollutants .
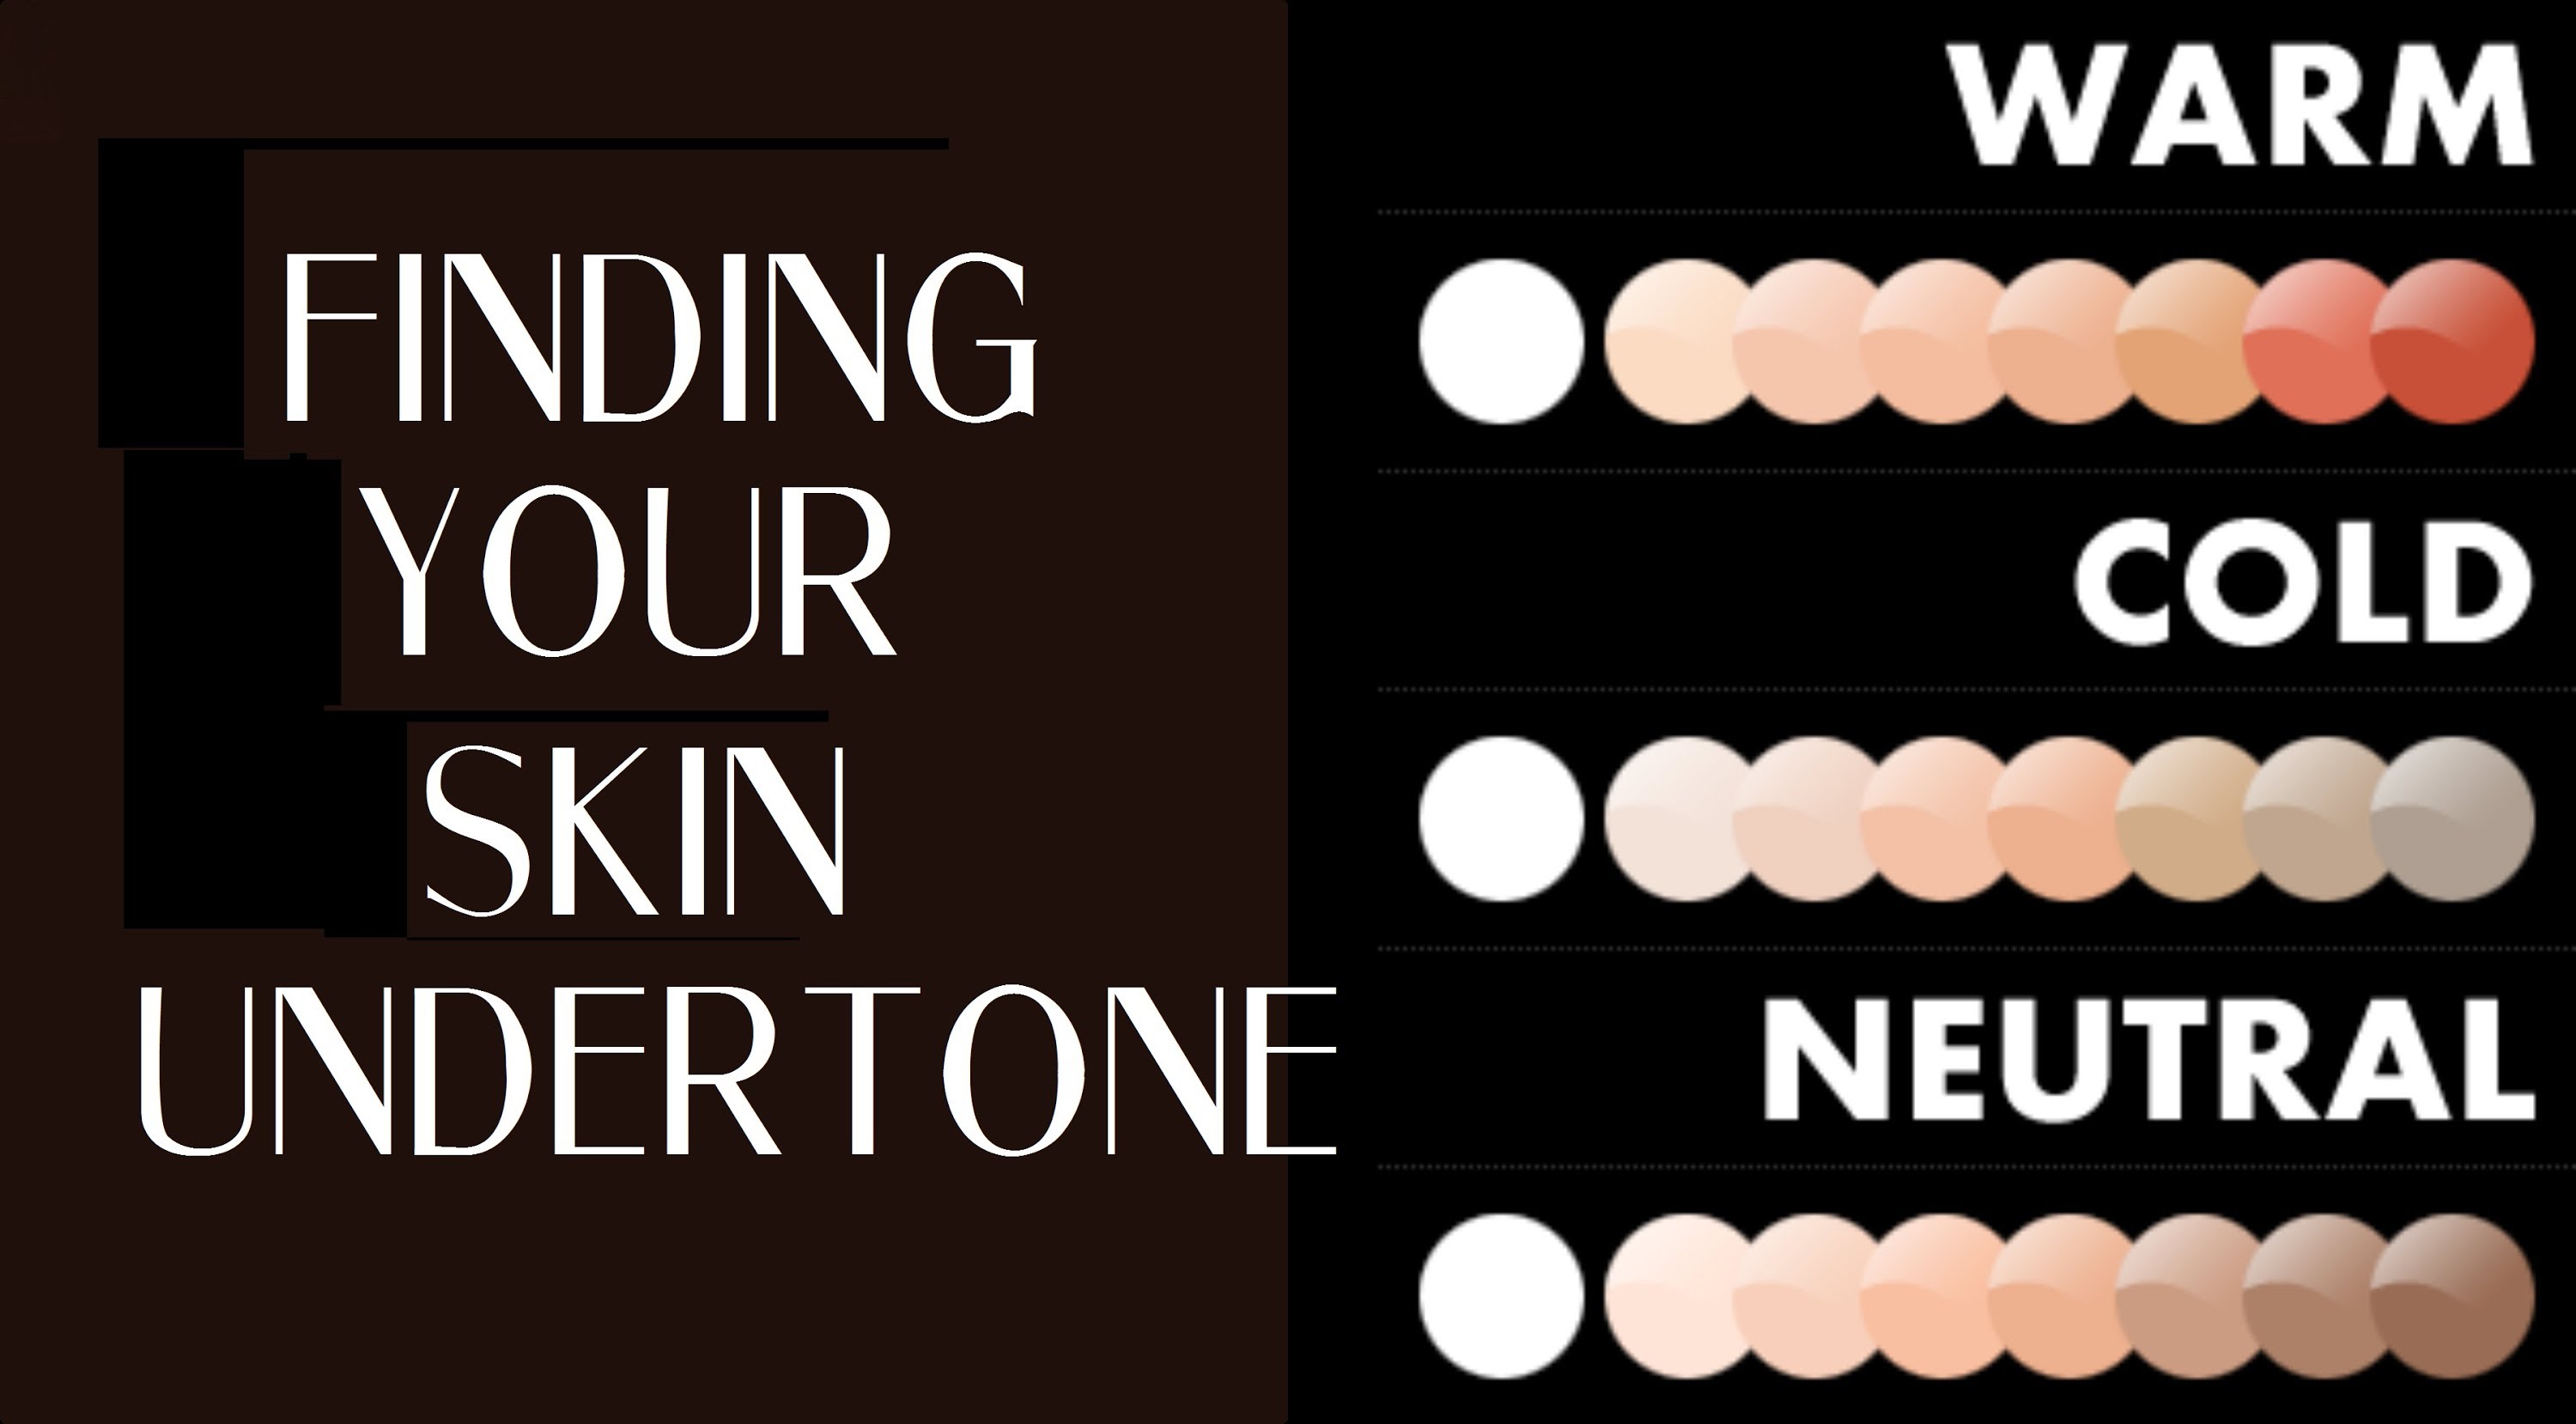
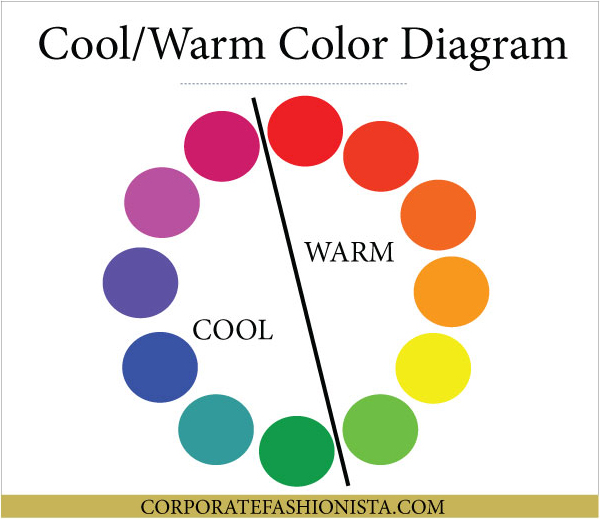
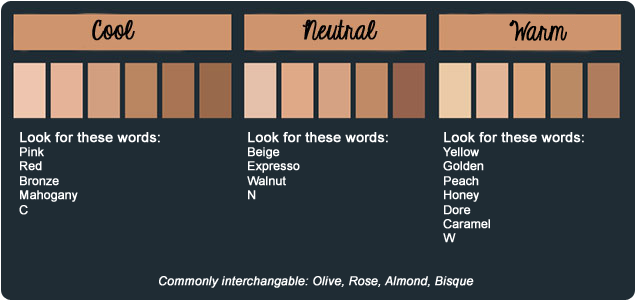
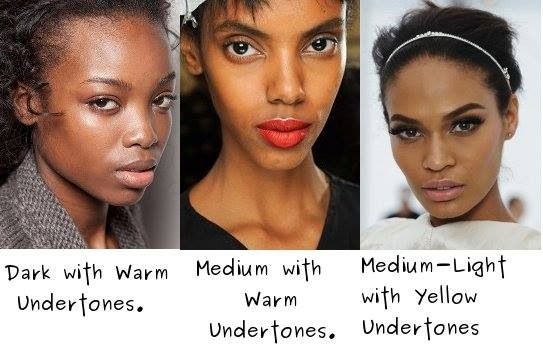
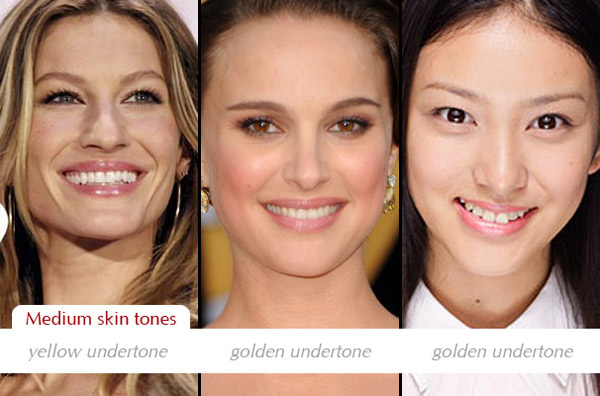
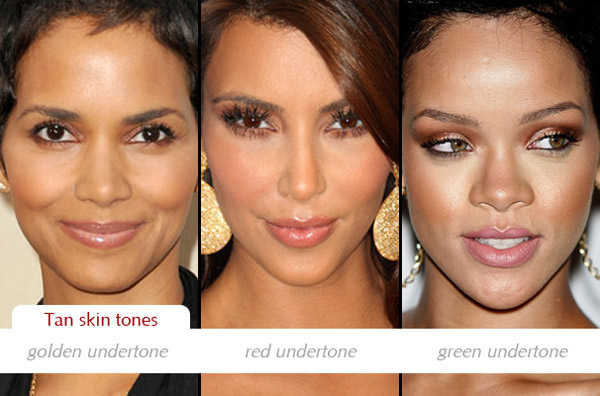
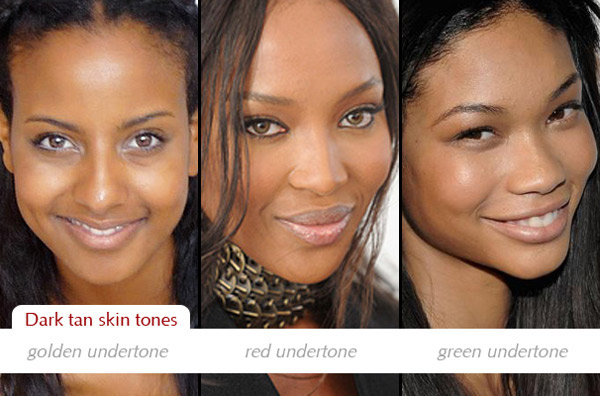
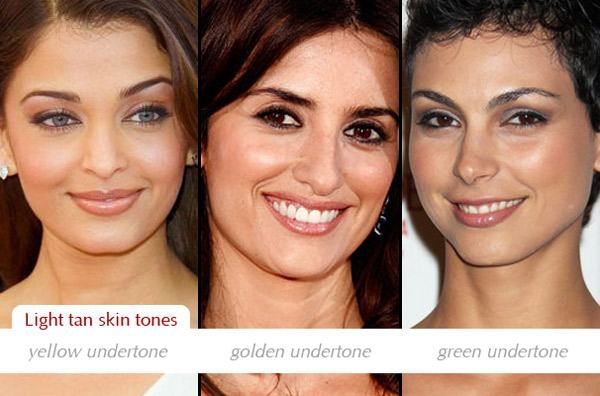
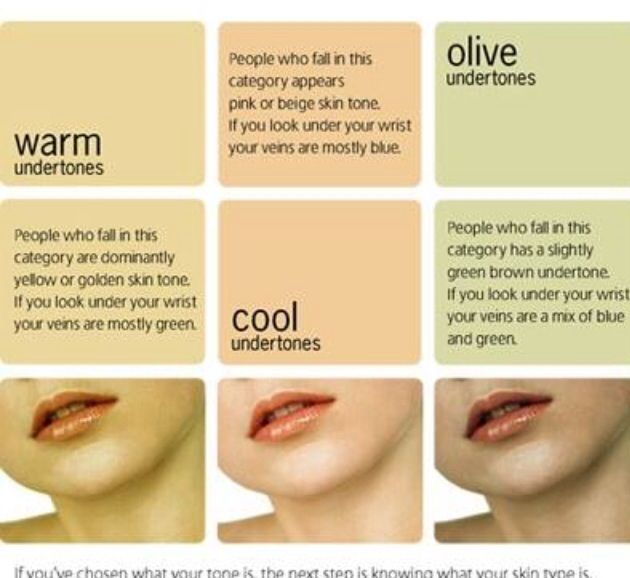
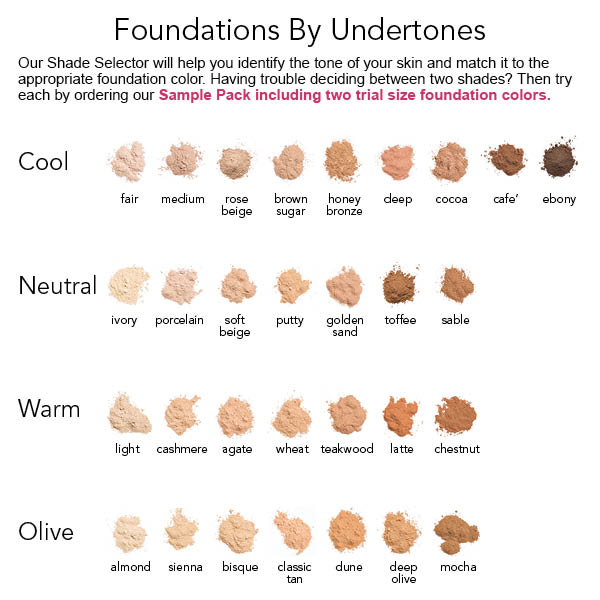
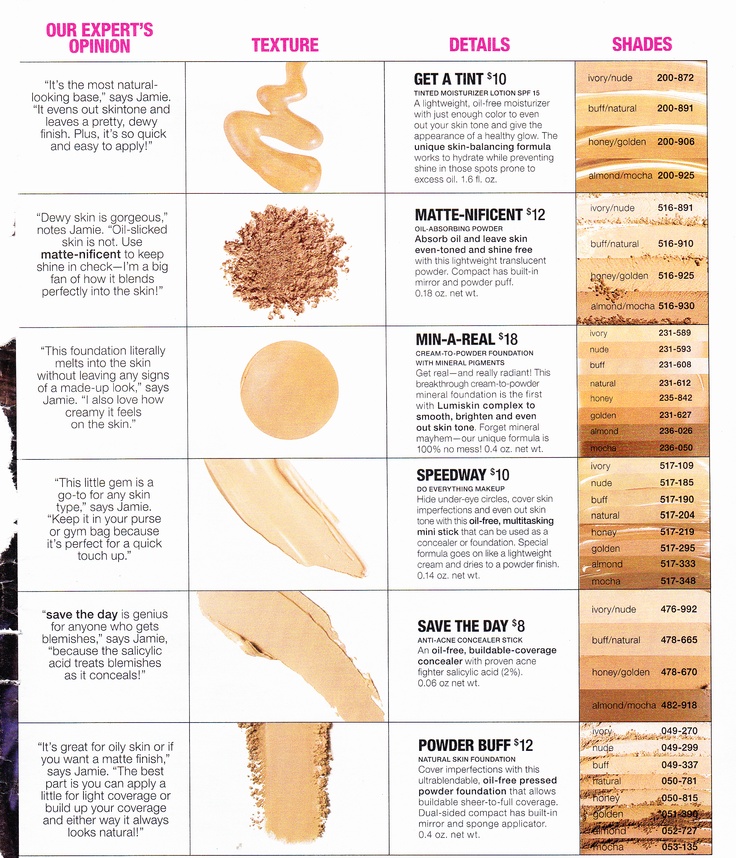
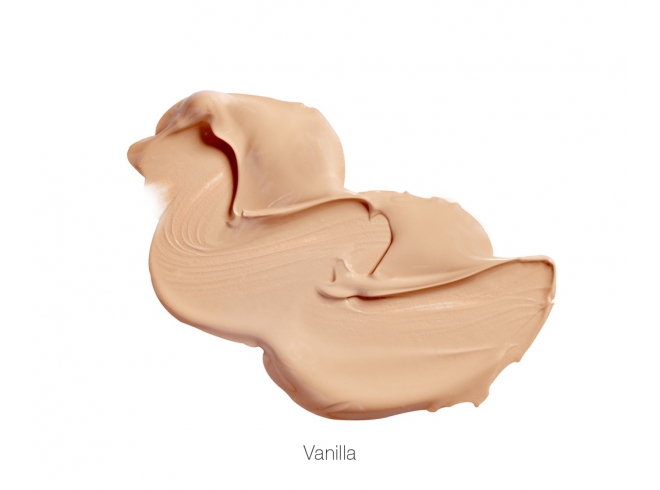
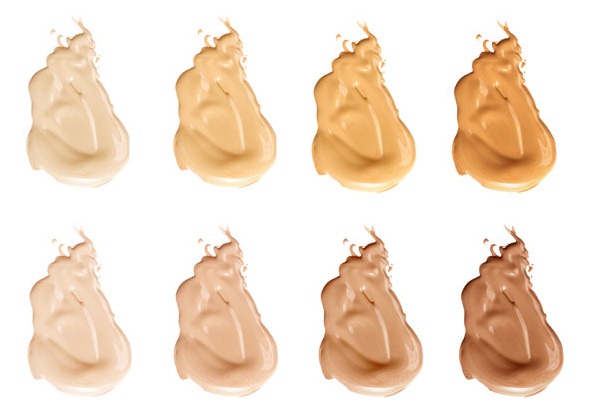
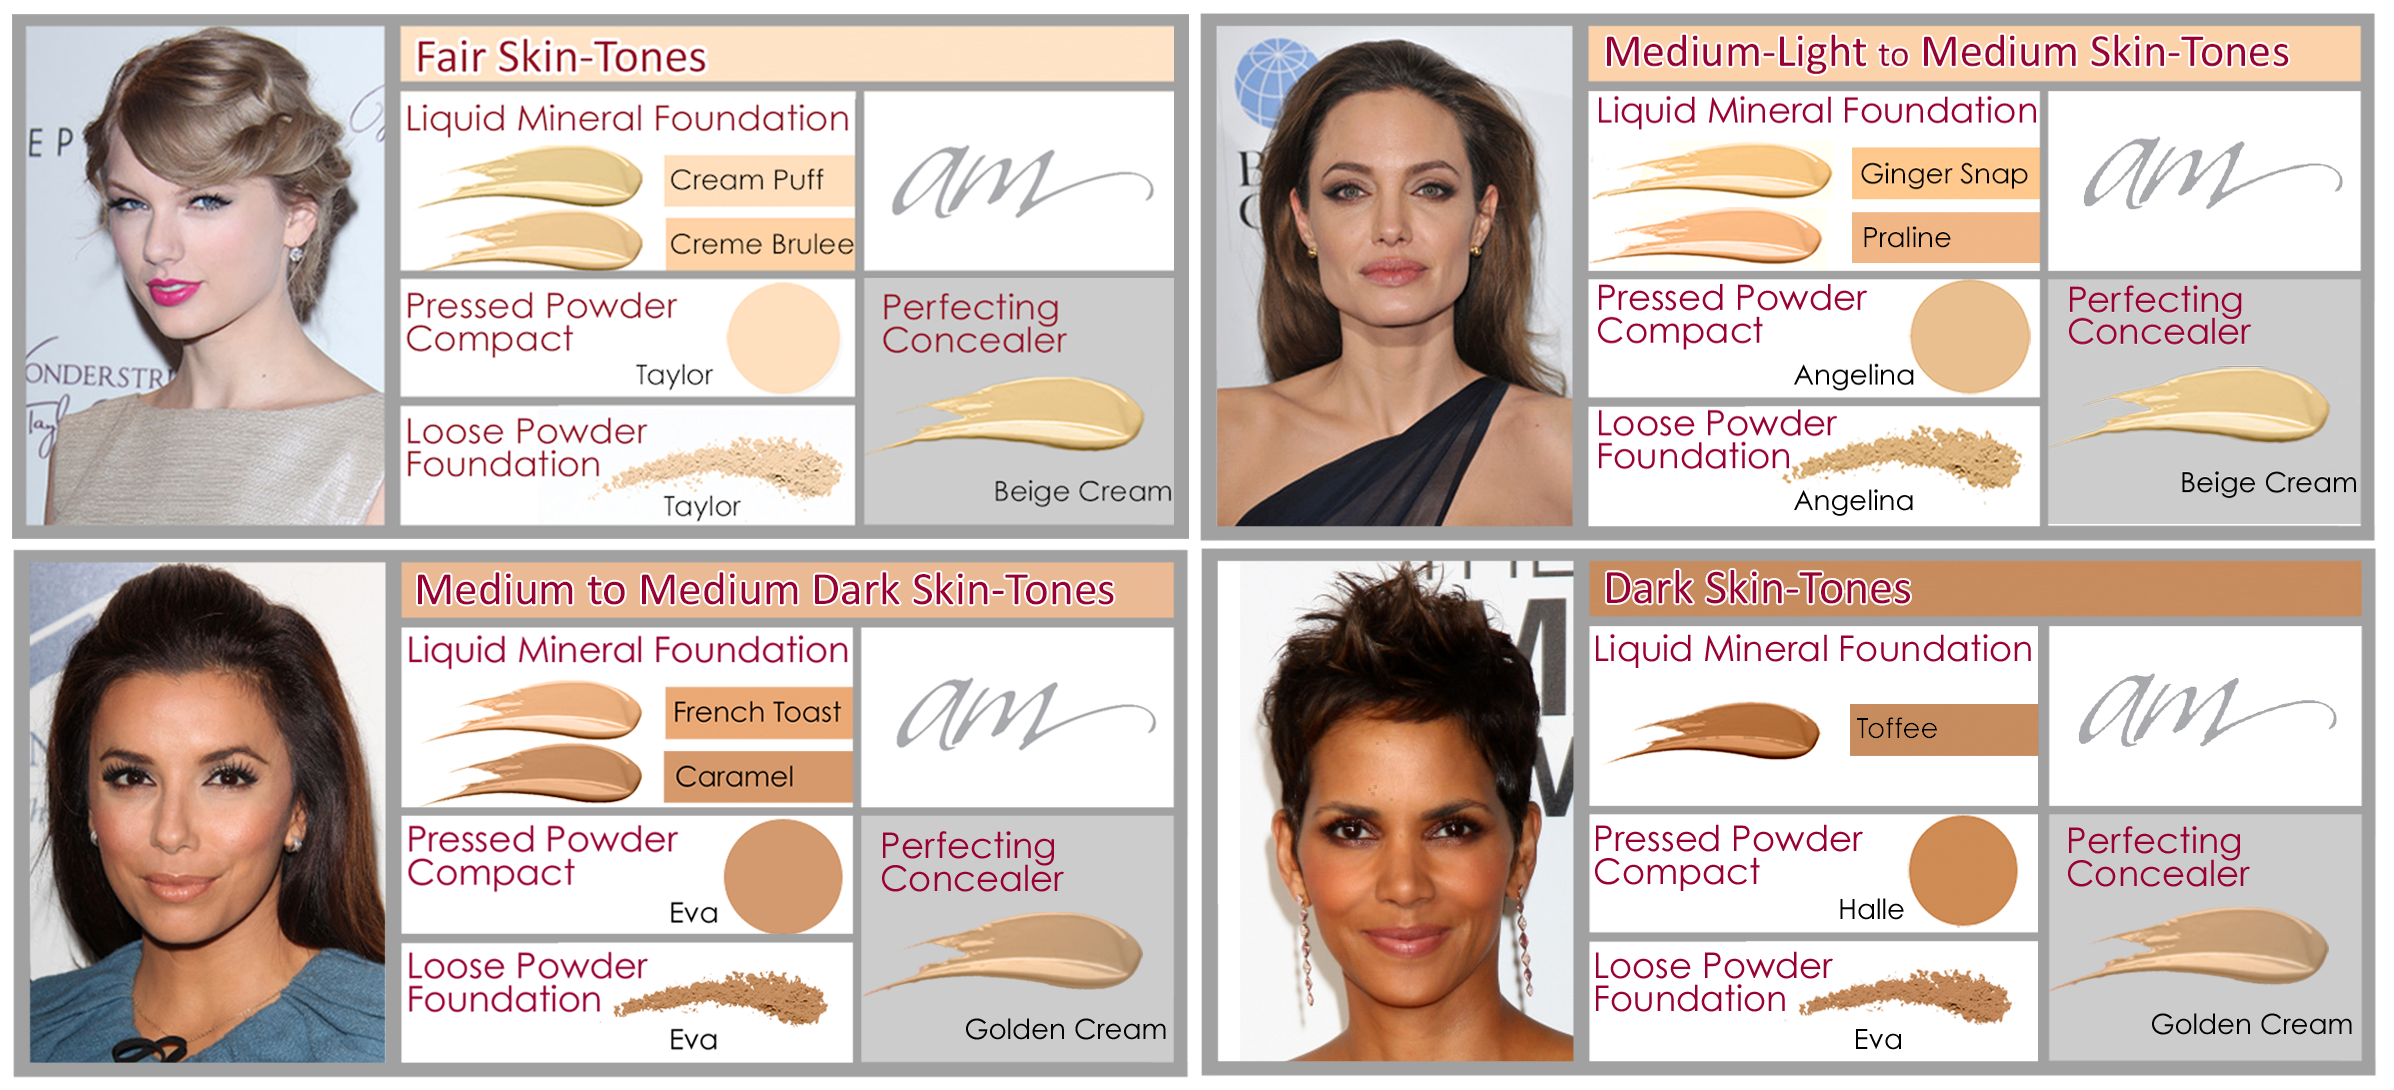
It is crucial to find your undertone, here are some charts and examples of what I am talking about.
Let’s talk a little about your skin type first
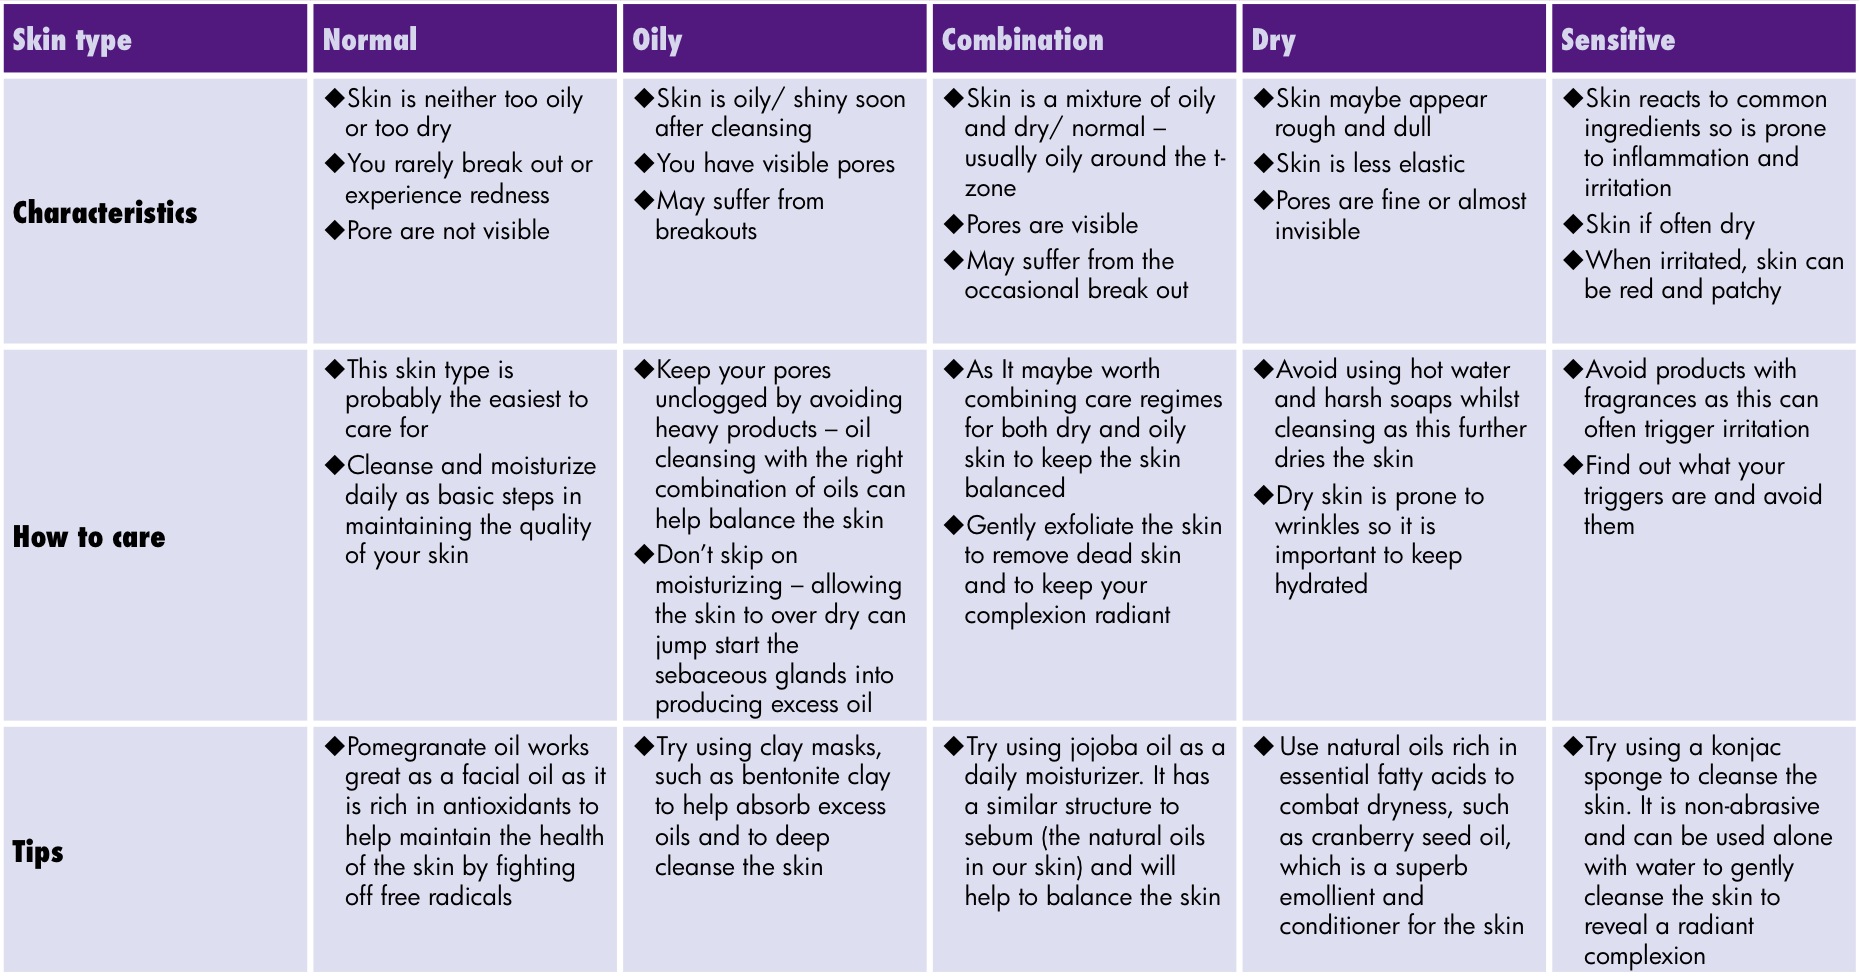
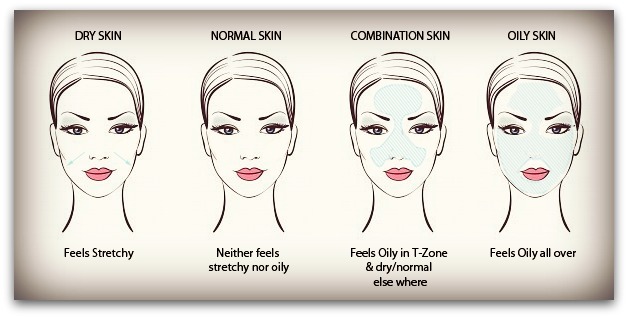
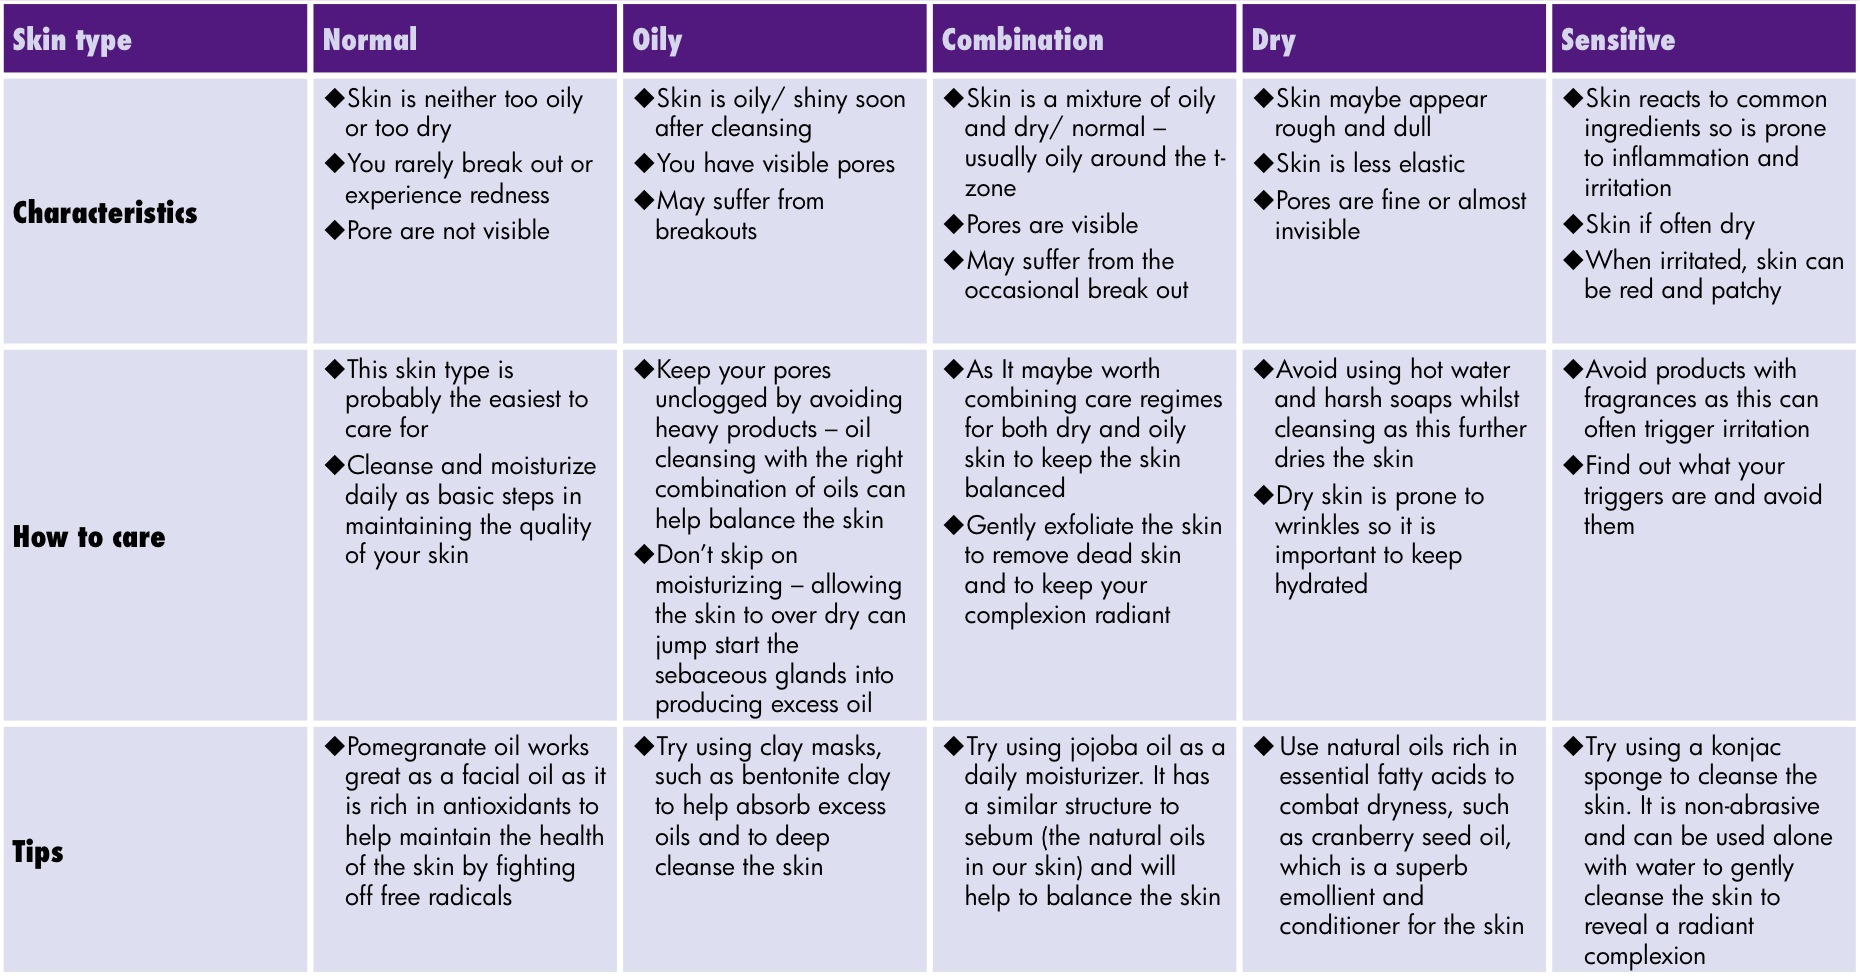
First things first Types of skin:
Find what is your skin type
what color undertones do you have in your skin
How much coverage do you spect
What type of finish you want by that we mean silky finish, matt finish semi-matt finish, the kind that has a glow, the thin kind that looks like you have nothing on.
The answers to this questions will help you to choose the ideal product for you bellow we share the type of finish to help you make a happy decision on what to choose.
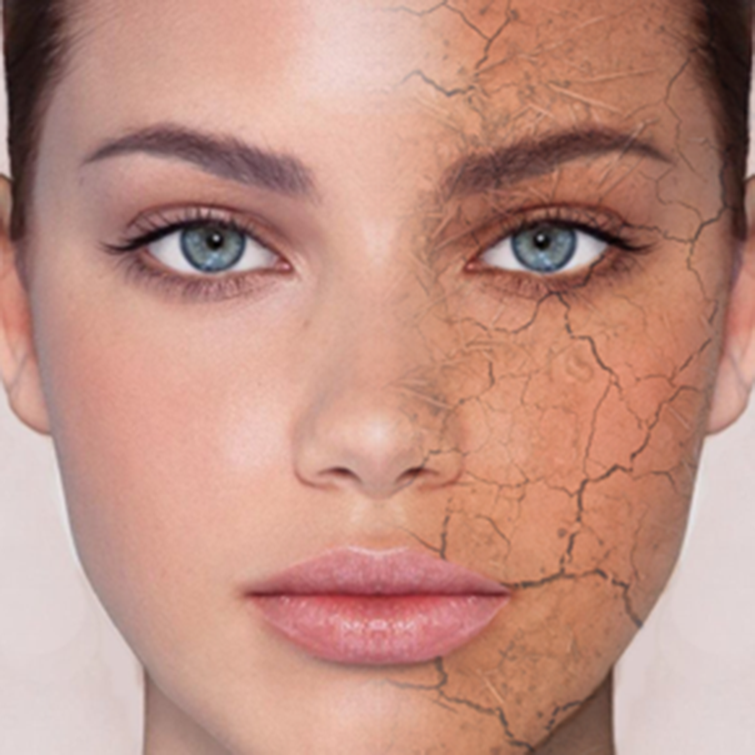
Dry Skin
Dry skin:
Is usual to think in mature skin first, my experience taught me that even teenagers ca be owners of dry skin due to dehydration and lack of healthy fats and oils.However the age is if we deal with skin that lacks emollients and is less elastic that feels tight after cleansing and has small pores it usually indicates that needs more moisturizing foundations with a formula that contains emollients and some antioxidants like tinted moisturizer, liquid moisturizing ones, mousse kinds they are you fluffy I like them, try them first some dry pretty cakey.
Those with a dry skin type will often experience flaking, as well as sensations of tightness after washing. This skin tone is prone to the development of a sallow complexion, fine lines and wrinkles and fine pores. An ideal DIY face cleanser for dry skin like coconut oil will moisturize and nourish dry skin, keeping it healthy and vibrant and will minimizing cracked skin, dry patches, and flakiness.
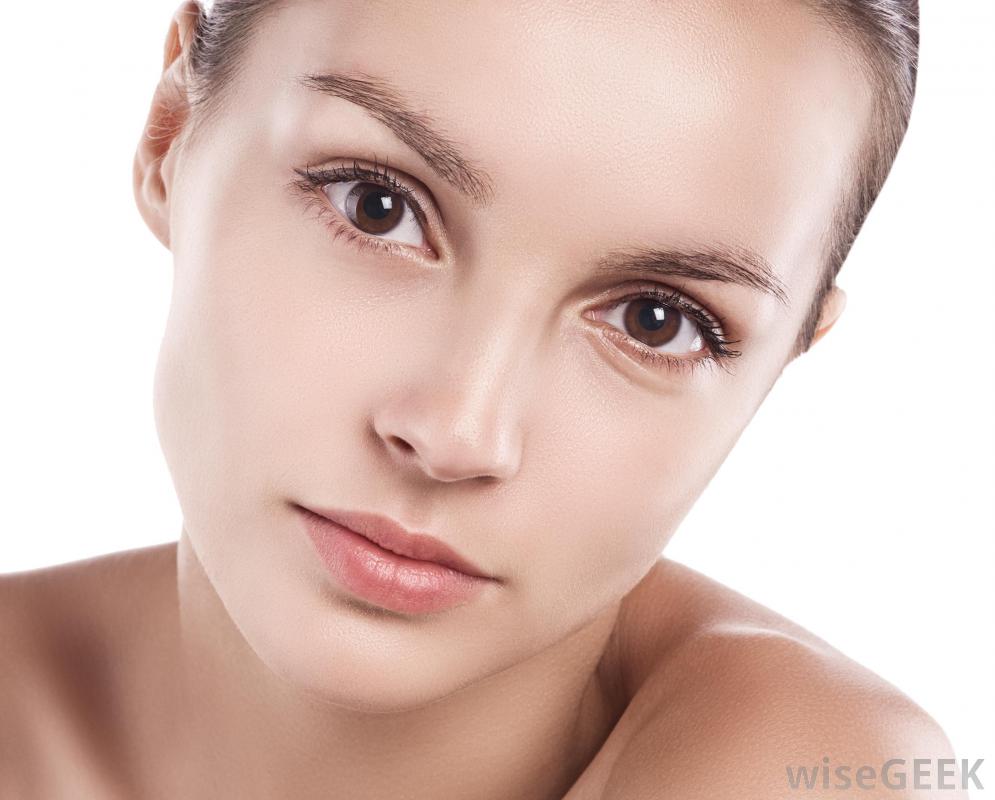
Normal Skin
Normal Skin
Is the kind of skin that has a few breakouts; neither too oily nor to dry with medium size pores with a smooth quality to it consequently smooth texture with a healthy color, generally this skin can use a cream powder foundation, tinted moisturizer, all types of liquid foundations, cream kind, the dual finish types, stick foundation and mousse, so this type of skin has quite a bit of selections as you can see.
Normal skin types don’t suffer from any particular afflictions, they are not prone to extreme or frequent breakouts, and don’t experience any oiliness or dryness. The complexion is fresh, elastic and supple. This is the ideal skin type that most people aspire to attain, and is the easiest to take care of. Face cleansers for normal skin types are meant to cleanse, refresh and moisturize the overall skin rather than treat any specific conditions or problem areas.
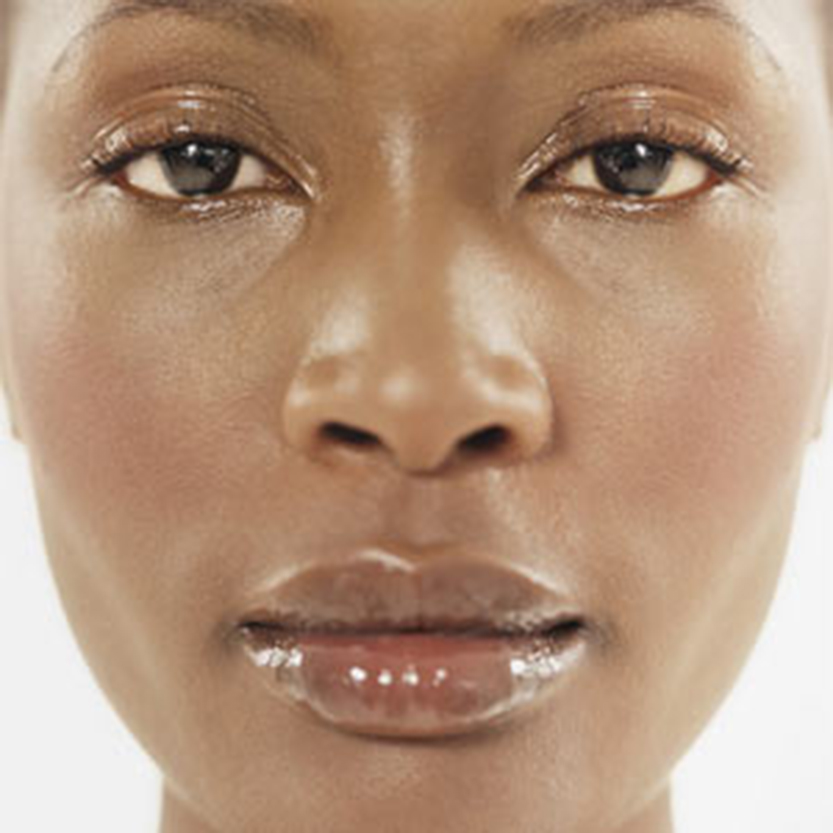
Oily Skin
Oily Skin
This type of skin is more prone to blackheads, larger pores, tends to get shiny fast, breaks out often, the good news is that it has less tendency to wrinkles due to the fact that is more elastic, so here is best to select foundations oil-free , non-comedogenic ( denoting a skin-care product or cosmetic that is specially formulated so as not to cause blocked pores.) so we mean products enriched with oil absorbers like cream to powders foundations, liquid oil free, water based, dual finished and good all mousse foundation.
Oily skin comes in many variations and is one of the most distressing to those who have it. Those with oily skin are most prone to breakouts and bouts of acne, as well as an overall course, greasy and/or shiny appearance.
Although it can be difficult to tackle at first, once you find the right oily skin face regime, you should experience minimal complications. The keys to treating oily skin are having a good cleanser and cleaning ritual, minimizing of carbohydrate, sugar and process foods consumption, and avoiding rich creams, moisturizers, and many standard face washes.
Sensitive Skin
Sensitive skin
The kind of thin skin that burns easily and it gets blotchy and it obviously has dry patches, this type of skin is more susceptible to rosacea and is very sensitive to products , it flushes easily is thin and very delicate, so consequently this type of skin needs non-allergenic products because even the hypoallergenic still can create allergies, is good to to use any products that contain fragrances, good to use moisturizing formulas, and avoid the formulas with sunscreen included.
Usually, sensitive skin types suffer from acne, leading them to require special products that are higher priced than standard skincare lines. Tightness, inflammation, redness, and irritation are all common problems for those with sensitive skin, so a very particular type of care is needed to avoid any further irritation.
Combination Skin
Combination Skin:
Here we recommend using a combination of foundations to accomplish the final finish you desire
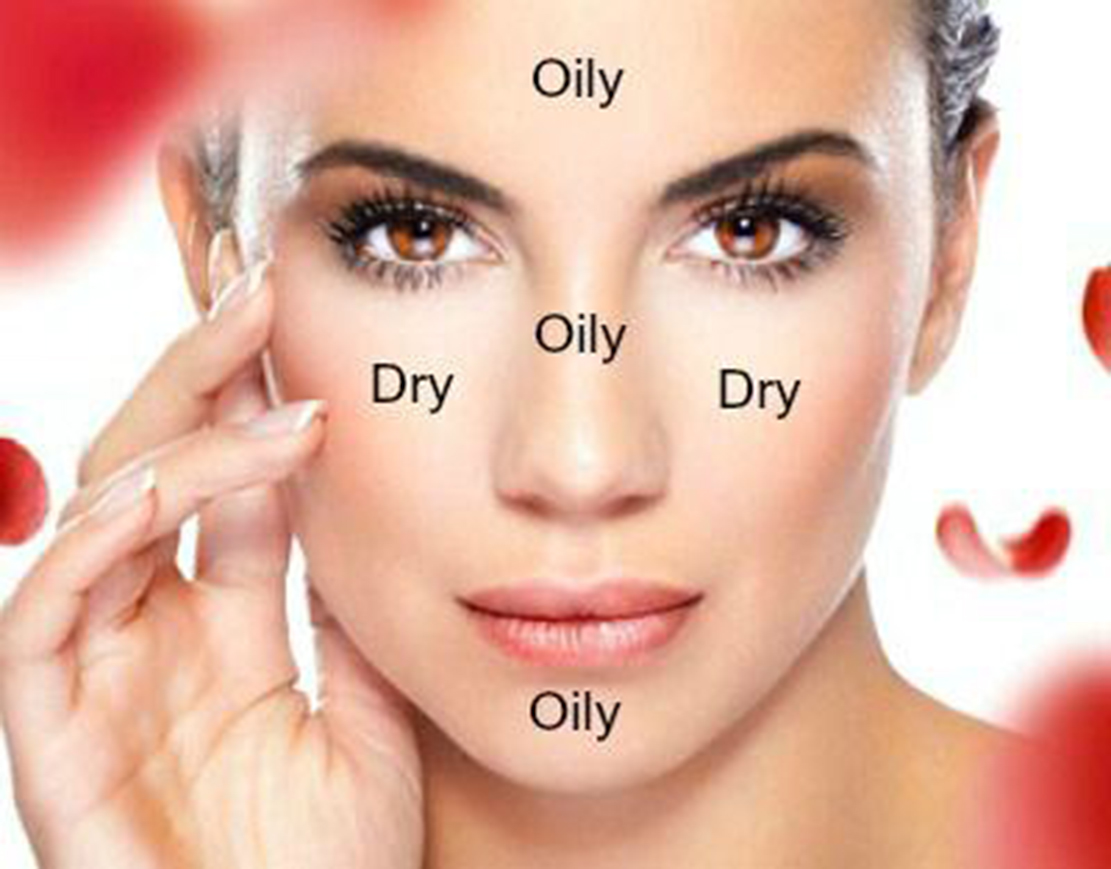
Those with combination skin tend to experience a mixture of oiliness and dryness in their “T-zone”, the area comprised of the forehead, nose, and chin. Different types of face washes and cleansers are needed to treat the different areas of the face. A face cleanser that moisturizes and freshens the skin will be best on the cheeks and nose, where combination skin types usually experience the most dryness, and a non-irritating, simple cleanser is best for those portions of the face that are oily.
Different types of foundation finish
Matte finish:
this finish is a great choice for normal to oily skin. It works best on skin with imperfections such as breakouts,scars, and discolorations. It gives you the best coverage and is great for oily skin due to the fact that it doesn’t contain oils.However use a very light hand, because if you apply too heavily it will look like a mask.
Dewy finish:
This foundation works great on dry skin because it adds moisture. It works wonders for most types of skin, except oily skin, where it can increase the shine and showcase any flaws such as surface bumps or blemishes. Dewey foundation is not such a good thing in the hot weather climates or in humidity locations because it can become to shiny and oily looking and no so much dewy.
Satin:
This foundation works for almost all skin types , with the exception of excessively oily skin. It gives the skin a soft, smooth appearance different than the dewy look it looks like healthy skin.The finish is not as flat as matte, or shiny as dewy, it falls in between the two.
Satin is the most common foundation finish
Luminous:
This foundation works well for any skin type. Its light-reflecting properties help hide tiny flaws and little lines by reflecting light off the surface of the skin.
Tip:
Foundation can also be applied to your lips. It creates a blank canvas for any reshaping you want or needs to do. It’s also useful as an anchor for lipstick since it makes the lipstick stay longer, I sometimes put a pretty gloss on it and it looks like the pale lips you see on JLO, some lips have lots of colors and can change the color of the desirable lipstick this can help that.
Which Foundation Type is Best for You?
from: http://www.paulaschoice.com/expert-advice/face/_/makeup-tips-tricks-foundation-selections
Without question, the right foundation is essential for a beautiful makeup application. Foundation serves as the canvas for the rest of your makeup and the best ones blend on smoothly and evenly, blending with your skin. If you’ve never tried foundation or if you don’t think you’ve found the best one for your skin type color yet, prepare to be surprised at the difference the right foundation makes!
Besides finding a foundation that matches your skin color exactly, it’s also important to choose the type of foundation that is best for your skin type and color, and that also matches your personal preferences.
For example, if your skin is oily, you don’t want to use the same type of foundation someone with dry skin prefers it won’t blend correctly. If you have acne or struggle with rosacea, you most likely won’t go for a sheer coverage foundation. And if you have normal skin with an even skin tone, you may not want the level of coverage some foundations provide.
So what are the different types of foundation and how do you choose? Following is a rundown of the types of foundations you will find anywhere you shop for makeup. Remember, knowing your skin type, the level of desired coverage, and your personal preferences are key to finding a foundation you’ll love to use!
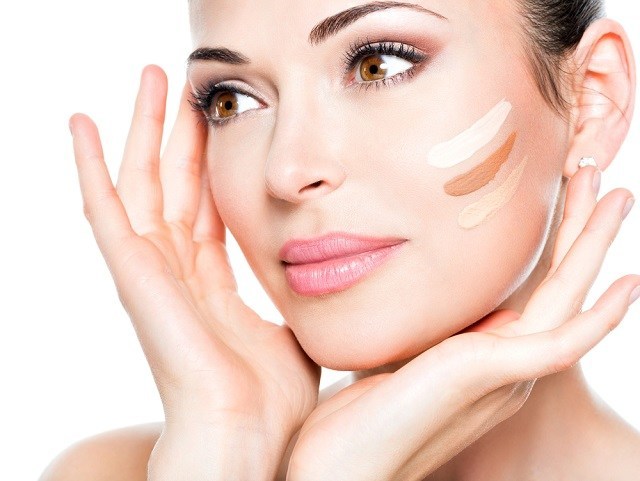
Oil-Free, Matte-Finish Liquid Foundations
The best foundations in this category should have a smooth finish with no shine or dewy appearance. Ideally, the matte finish should last for at least a few hours, but that depends on how oily your skin is. Most oil-free liquid foundations provide sheer to medium coverage, but you can build coverage to the level you desire.
The best foundations in this category have these traits:
Lightweight texture and finish (this type of foundation doesn’t feel heavy).
Easy to apply and blend with a sponge or brush.
Buildable coverage.
Helps control excess oil to keep your skin shine-free for at least a few hours.
Generally a safe choice for breakout-prone skin.
Works great with pressed powder, powder blush, and bronzers.
Possible negatives to watch out for:
Depending on the formula, this type of foundation may make your skin look or feel dry. It can help to use a primer (such as a mattifying serum loaded with antioxidants) that adds a soft finish to the face, definitely, you can prep the skin with a light nonoily moisturizer let it sit and with a tissue.
Tip:
Here you can prep the skin with a light nonoily moisturizer or a light serum, let it sit and with a tissue or a sponge absorb the excess, in the meantime, you can do you brows or eyes.
If your skin is very oily, it could help a great deal to use an oil-control “primer”
Foundations with a matte finish can exaggerate little lines and flaws if the finish is too dry.
Not the best if you want to use cream blush or bronzer, as the finish makes it difficult to blend on smoothly.
Long-Wearing, Matte-Finish Liquid Foundations
These liquid foundations are almost always oil-free and the best ones are truly long-wearing and stay put. Most have a thin consistency that sets in place quickly, so blending must be fast and precise. Most blending mistakes can be fixed, but not as easily as with other types of liquid foundations. Those with oily to very oily skin typically do best with this type of foundation.
Tip:
Here is important to keep in mind the blending again be aware not to rub or pull the skin too hard when applying the foundation and less is more.
The best foundations in this category generally have these traits:
Excellent if you have very oily skin or if you prefer your foundation to look “just-applied” all day.
Thin texture and matte finish make this type of foundation a safer bet for breakout-prone skin.
Can be great for those who live in humid climates and cannot get their foundation to last.
Perfect for those who prefer a strong matte finish.
If the foundation is rated SPF 25 or greater, it is a great way to ensure your oily skin gets the sun protection it needs without adding layers of products.
Great for use with sheer matte powder blushes and bronzers.
Possible negatives to watch out for:
Because these set quickly, blending must be fast and precise without rubbing or pulling a tapping motion is best.
Will magnify even the slightest hint of dryness (so prepping dry areas with a moisturizer or serum is essential).
Tip:
Use the lightest moisturizer or serum possible to hydrate without adding a moist, slippery feel.
The long-wearing finish can make powder blush and eyeshadow application tricky. Blush and eyeshadows with a soft silky finish are your best bets like cream or mouse kinds.
This is a challenging type of foundation to remove. For best results use a makeup remover as well as your regular cleanser with a soft washcloth to be sure you’re getting all your makeup off each night again be gentle, you may want to play the cleanser and let it sit for a few minutes to soften the makeup.
The long-wearing, relatively unmovable finish of a truly long-wearing foundation makes blending a cream blush or bronzer over it skillful.
Moisturizing Liquid Foundations
These liquid foundations usually have a slightly thicker texture than oil-free foundations and typically are easy to blend due to the amount of slip they have. The best in this category also offer helpful skin-repairing ingredients as well. Because this type of foundation offers a satin or satin-matte finish, they’re perfect for women with normal to dry skin.
The best foundations in this category generally have these traits:
Typically provide light to medium coverage so your great skin shows through.
Easy to blend because most have great slip without being greasy.
Can be used with cream or cream-to-powder blush and/or bronzer.
The soft finish and slight sheen add a healthy glow to your skin.
Possible negatives to watch out for:
Generally not the best option for women with combination skin (the finish makes oily areas look worse).Here you can apply a different product in the oily areas that match the foundation.
A tricky option for those with blemish-prone skin because the moisturizing ingredients can perhaps contribute to clogged pores.
Satin finish is a beautiful look for women of color (strong matte finishes can make dark skin look ashen if the undertone is not correct for the color of skin).
Works with powder blush or bronzer only if you set the foundation with a sheer application of loose or pressed powder so the blush or bronzer doesn’t grab and look too heavy.
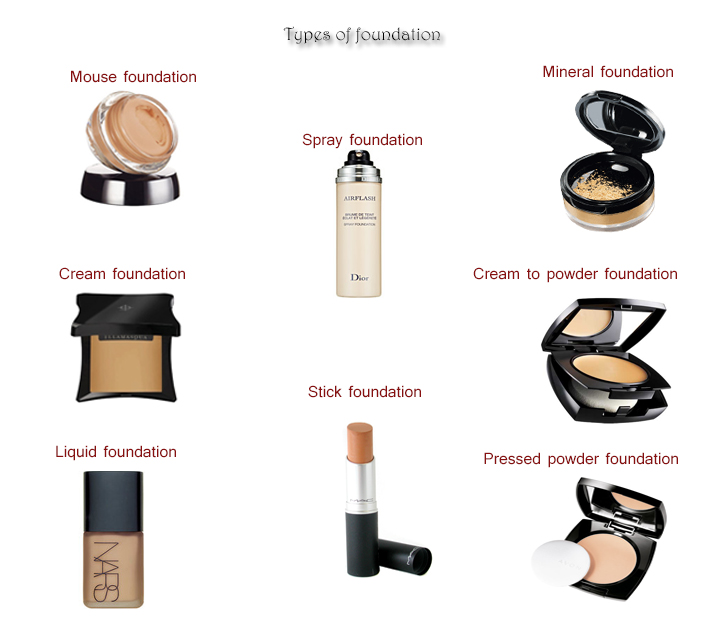
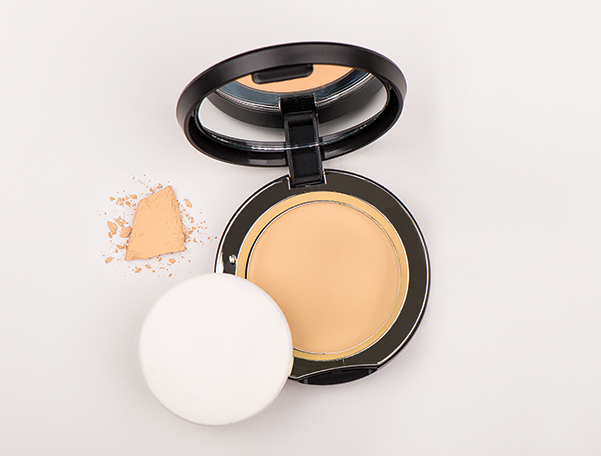
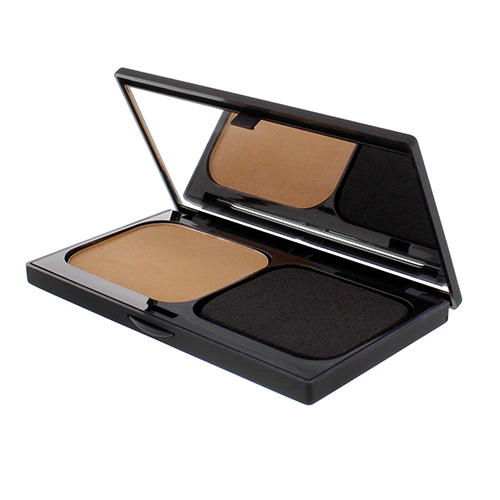
Pressed Powder Foundations
These foundations come in a compact and work like regular pressed powders, only with a bit more coverage and ability to stay put. The best ones in this category have a wonderfully silky feel and are easy to blend. Pressed powder foundations provide light to medium coverage and can work for normal to slightly dry or slightly oily skin types. If you have oily skin, powder foundations can look thick and clumpy; if you have dry skin, the powder will absorb moisture, making your skin drier.
The best foundations in this category have these traits:
For those with normal to slightly oily or slightly dry skin, this type of foundation is a fast, easy way to get a smooth finish.
Some pressed powder foundations have a slight shine, which can add a soft glow.
Portable and extremely easy to apply with a brush (sheer coverage) or sponge (medium to full coverage, but be sure to blend well to avoid a heavy, powdered look) I like to use a damp sponge with it very lightly misted so it doesn’t make streaks or uneven application.
Feels light and makes skin look even but not heavy, if applied carefully.
Excellent to use over a daytime moisturizer with sunscreen. These foundations help reduce the shiny finish of some sunscreens.
Works beautifully with powder blush or bronzer.
Possible negatives to watch out for:
Not a good option if you have any amount of flaky skin because the absorbent finish “grabs” and exaggerates this unwanted issue.
The finish can be too absorbent and feel uncomfortable on dry skin.
Can look too thick or change color on those with very oily skin. The color change occurs when pigments in the foundation mix with the excess oil and oxidize.
The powdery finish doesn’t work well with cream blush or bronzer, is best with powder kinds .
If you want more coverage, building too much powder on your skin can look thick and overdone.
Tip:
Here again is huge to determine the undertone of the skin or it will look like like a plank over your skin cardboard like, no so pretty.
Cream-to-Powder Compact Foundations
These foundations are a cross between a pressed powder and a creamy liquid foundation. They have a very creamy, almost greasy, appearance, but if you’re using the best ones in this category, the creaminess will disappear after you blend them on, leaving you with a slightly matte, powdery finish. Coverage can go from sheer to full depending on the formula and how much you apply.
The best foundations in this category have these traits:
Blends quickly and easily with a sponge or brush, setting to a semi-matte or powdery finish.
Great for those with normal to slightly dry or slightly oily skin if you don’t want a true matte or dewy finish.
Typically doesn’t need to be set with powder, which saves time and prevents the powder look.
A wide range of coverage, from sheer to full.
Portable, so touch-ups on-the-go are easy.
Generally works well with powder blush or bronzer.
Possible negatives to watch out for:
Depending on the formula, can blend on too thick and look more obvious than other types of foundation.
Not for very oily skin because the cream portion exaggerates shine and the powder finish isn’t strong enough to keep excess oil in check.
Not for dry to very dry skin because the finish exaggerates dry areas, even when they’re prepped with moisturizer.
Depending on how powdery the finish is, this type of foundation can impede smooth application of cream blush or bronzer.
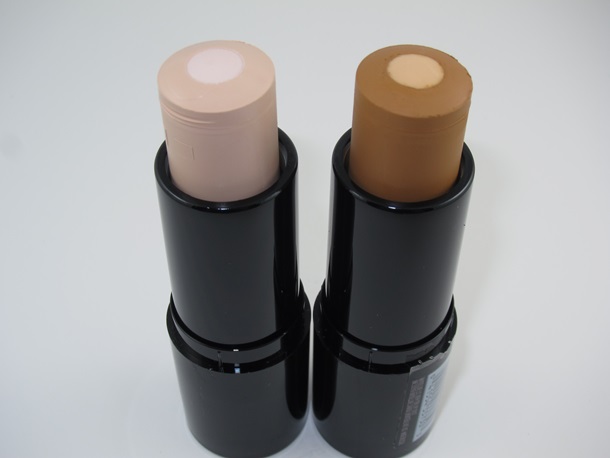
Stick Foundations
Stick foundations are essentially cream-to-powder foundations in stick form. If you want a cream-to-powder foundation and prefer the convenience of a stick these are an option.
Most stick foundations go on a bit thicker than powder or cream-to-powder foundations, which make them a little more challenging for those with oily or blemish-prone skin. Plus, some stick foundations feel thick and heavy, so are use your discretion when you choose perhaps you can get a sample and try it is what I recommend for products anyway, apply it and see how it wears and then make your decision. You will save lots of money in the process, Sephora usually is more than willing to give samples .
Because of their size and the type of packaging, stick foundations do travel well, but overall, even the best ones in this category should be approached with common sense.
The best foundations in this category have these traits:
Silky, smooth texture that you can “stripe” on the skin and blend with a sponge or brush.
Lightweight, soft matte finish that makes skin look refined.
Portable and can double as your concealer.
Possible negatives to watch out for:
Some stick foundations have a thick, waxy texture that looks heavy and can lead to clogged pores and/or can worsen acne not to mention look overdone.
Blending can be tricky because most stick foundations set quickly, so you don’t have as much play time as with liquid foundations.
If the finish is too creamy, it can crease into lines around the eye, so carefully blend.
This type of foundation is not the best for blemish-prone skin.
Sheer Foundations and Tinted Moisturizers
Sheer foundations and tinted moisturizers are basically interchangeable. They are an excellent choice for a touch of color along with moisture and, more often than not, sun protection. For casual weekend makeup, sheer foundations or tinted moisturizers are excellent options for normal to dry or slightly oily skin that does not need significant coverage.
The best foundations in this category have these traits:
Sheer foundations and tinted moisturizers are extremely easy to choose and use because they are so sheer you must pay attention again to undertones of your skin because they blend on almost invisibly but it will show streaks if is not match.
Great for adding a touch of color to pale or sallow skin.
Combines soft color, hydration, and sun protection in one product, although you must apply liberally to get the amount of sun protection stated on the label.
Works beautifully with cream or cream-to-powder blush or bronzer.
Possible negatives to watch out for:
Coverage can be too sheer for major apparent flaws, including skin discolorations, broken capillaries, or red marks from acne, rosacea, or dark circles etc.
Generally, these are too moist or creamy for oily or breakout-prone skin, putting you at risk for further breakouts.
The moist finish makes application of powder blush or bronzer difficult. For best results, set with a dusting of loose or pressed powder or go for a cream blush or bronzer.
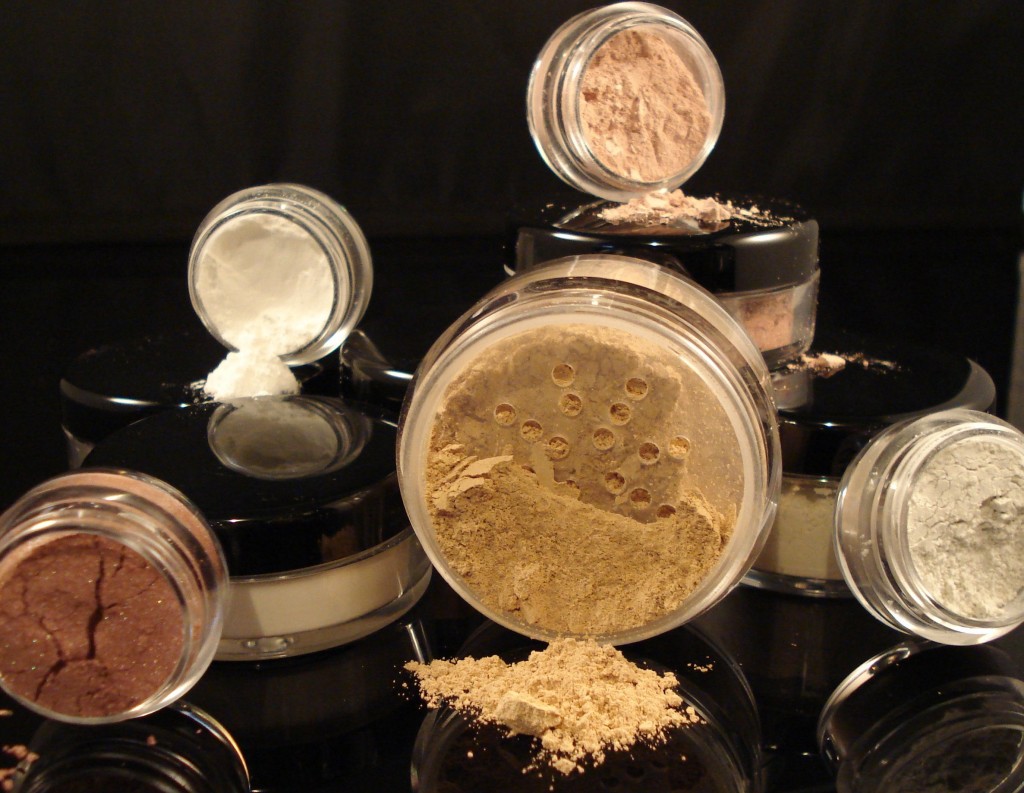
Mineral Makeup
Despite widespread marketing to the contrary or what you may have heard, mineral makeup isn’t a special type of foundation—it is merely a powder foundation sold in either loose or pressed form.
The same ingredients used in mineral makeup show up in other powder-based foundations, too. Although there is no compelling reason to choose mineral makeup over other types of foundation (it isn’t better or safer for your skin, even if it is sensitive), many women like the natural-themed names of these products and are attracted to the branding.
As mentioned above, mineral makeup comes in loose or pressed versions, although the loose powder version is more common. Both typically provide heavier coverage than what you can achieve from regular pressed-powder foundations.
The best foundations in this category have these traits:
Most mineral makeup provides medium to nearly full coverage without looking too powdery or making skin appear dull.
Mineral makeup with sunscreen rated SPF 25 or greater is an easy way to add to the sun protection from your daily moisturizer and/or liquid foundation.
Can add a soft shine finish to the skin, but be careful because many mineral makeups impart too much shine.
Works beautifully with powder blush or bronzers.
Possible negatives to watch out for:
Mineral makeup can be drying and too absorbent for dry skin or dry areas.
The color can oxidize, pool in large pores, and change color or look streaky over oily areas.
The loose mineral foundation is by far the messiest type of foundation. It can be a pain to travel with because the powder tends to “leak” and the component gets messy.
This type of foundation is not at all compatible with cream blush or bronzer.
The other drawback for us is that most people don’t clean the brush that buffs the makeup on the skin and it will collect bacteria, just keep in mind the powder itself contains Mica which is like tiny little crystals like particles and the rubbing into the skin that is aggressive causes tiny lacerations, not our favorite.
Self-Adjusting Foundations
These foundations supposedly stop or claim to control oil production and also moisturize skin wherever it’s dry. We have yet to see one perform as promised, but it would be great if someone came up with one that did! Ignore the wild claims and focus on the other attributes of these types of foundations—they’re almost always lightweight, oil-free liquid foundations best for normal to slightly dry or slightly oily skin.
Be wary of foundations that claim to adjust to your ideal skin tone. They can come close if the shades are neutral and natural-looking, but you almost always will get a better match from a foundation that doesn’t make hocus-pocus skin-matching claims.
Last, avoid color-correcting foundations; that is, those with a mauve, mint green, bright peach, or strong yellow tone. For these to mask a skin-tone issue, they must provide enough coverage, and if they provide that much coverage, then the color-correcting product looks obvious and unnatural. For best results, look for neutral to slightly yellow-toned foundations to diffuse a ruddy, dull, or sallow skin tone.
Applying Foundation
from: http://www.marieclaire.com/beauty/news/a14852/foundation-how-to-apply/
Foundation—it’s the all-important canvas for the rest of our makeup, but when it comes to technique, it always seems to be shrouded in mystery. Between what products to use and how to use them, it’s something you’ve got to get down to a science in order to achieve that flawless, yet miraculously natural-looking skin.
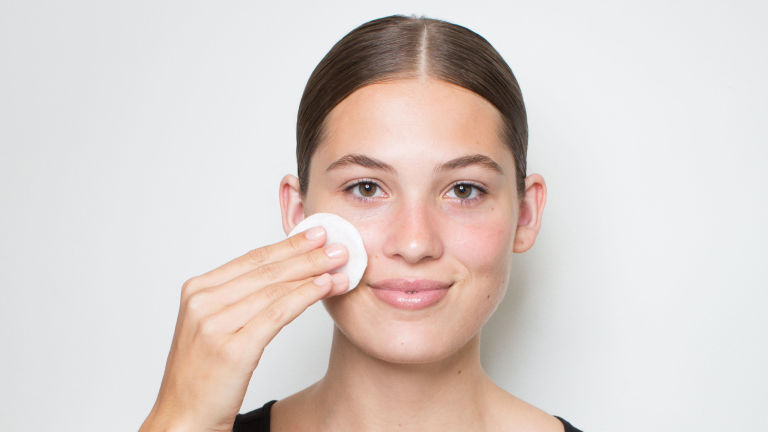
Step 1: Remove Makeup and Cleanse
Pro Tip: “It’s best to make sure the skin is completely clean and prepped before applying moisturizer. Even if you aren’t wearing makeup, you can use a cleansing water like a Rose one, almost always removes leftover makeup, dirt, and grime from the skin. Behind the scenes, at fashion week this cleansing water is what makeup artists use to remove makeup.”
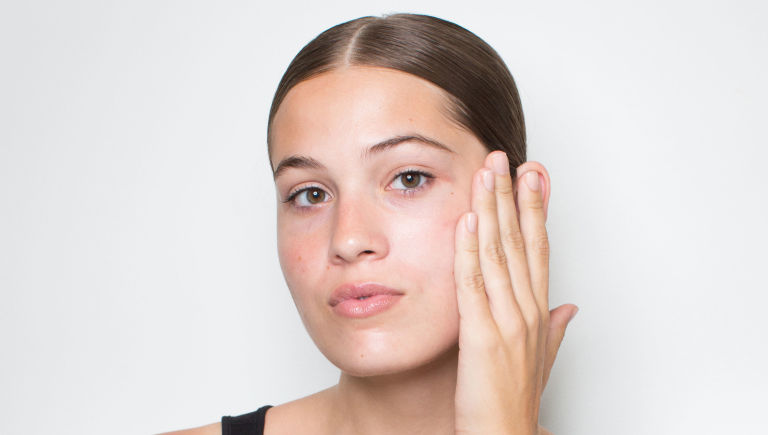
Step 2: Moisturize to Prime the Skin
After the skin is cleansed properly, use a rich,or light nourishing moisturizer depending on the skin to rehydrate the skin.
Pro Tip:
“It’s best to warm up the moisturizer in between your hands then press it into the skin. If you’re more on the oily side, use a gel-based moisturizer that is matte and applies with just your fingertips or a foundation brush.”
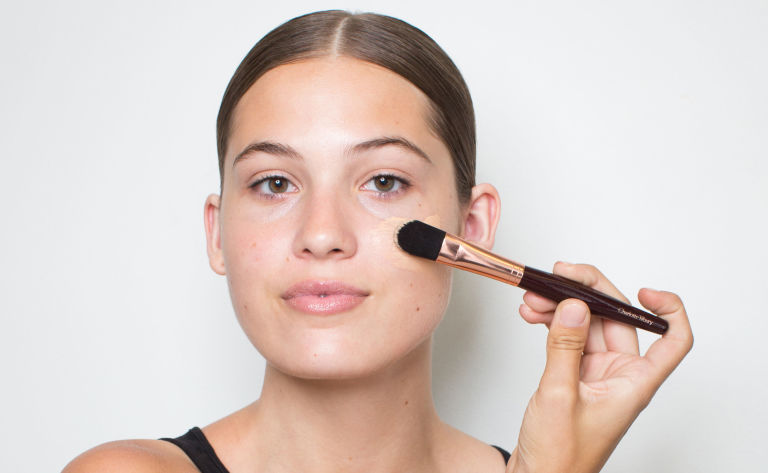
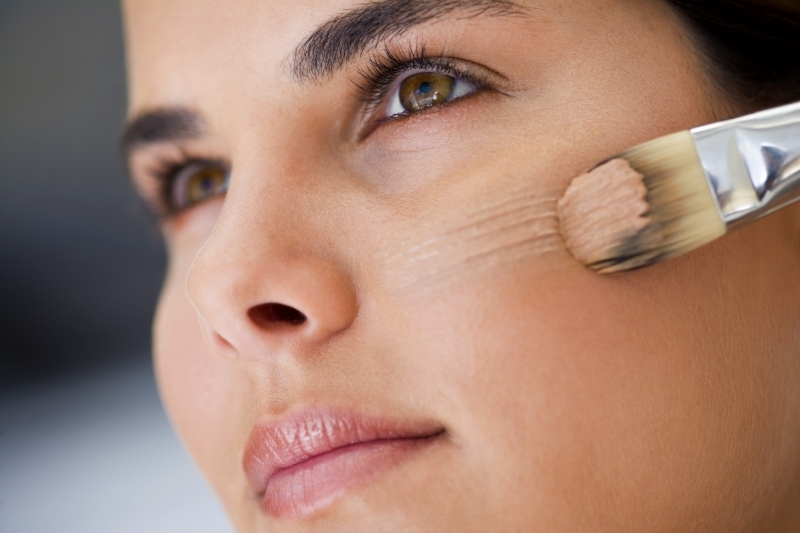
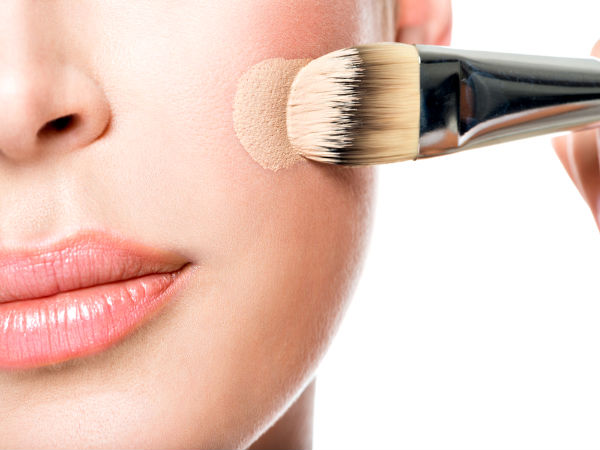
Step 3: Apply Foundation with a Foundation Brush
Pro Tip:
“Use a foundation brush and apply the foundation starting in the center of the face and blend out.”Please don’t forget the neck and go behind raping around the ear so it doesn’t look behaved!!.
When it comes to choosing a formula, look for something that looks natural, has a flawless finish, and feels weightless.
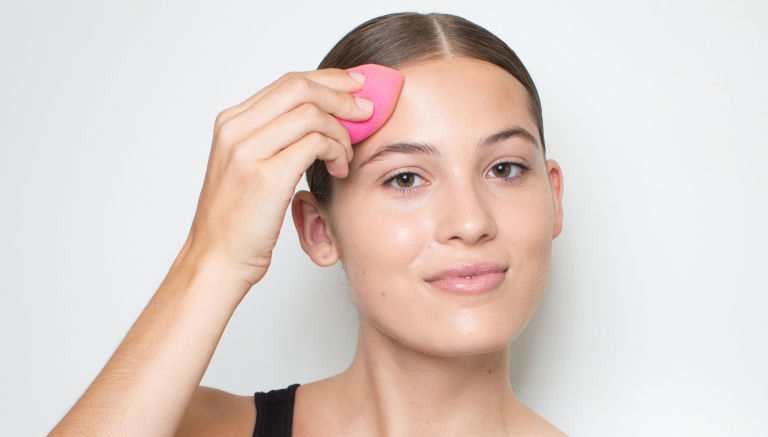
Step 4: Gently Blend in a Rolling Motion
Start with a *damp* sponge because it softens the sponge and won’t absorb any of the product you just applied to your face.A good brush will also do.
Pro Tip:
“Blend the foundation with a rolling motion and press it into the skin.” you can also use a foundation brush.
Step 5: Conceal Blemishes and Redness
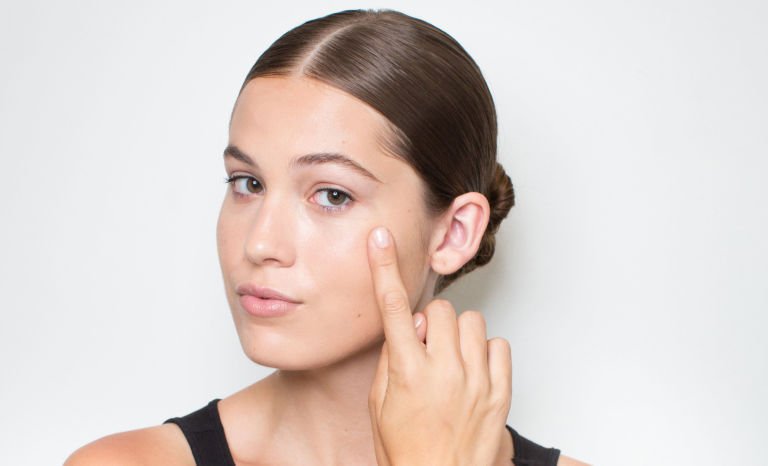
Tap on concealer to conceal any blemishes or redness that’s coming through.
Pro Tip:
“I like to use a clean fingertip as the warmth of the hand helps blend it. It also adds just the right amount of product to cover the blemish.”
Don’t don’t always use fingers duet cross contamination not only to the product but to my clients.
Step 6 : Set
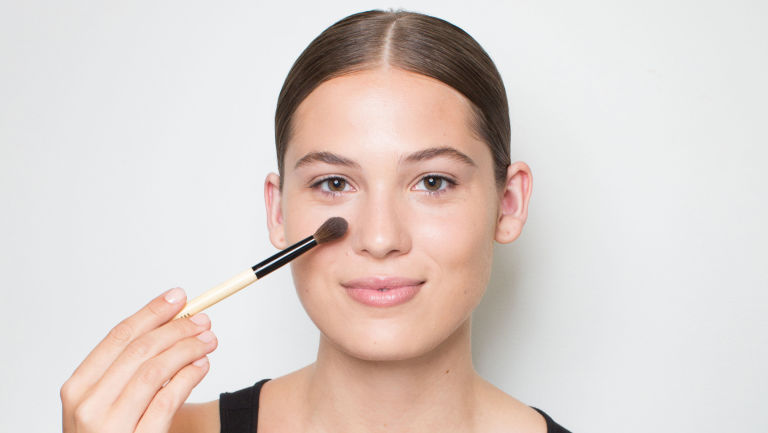
You can set the foundation with a noncolor powder or anti-shine. Using a soft, small, and synthetic hair brush, gently tap any excess product off then sweep the setting powder only over areas that tend to be shiny: in between the eyebrows, down and around the nose, under the eye, and on the chin.
Pro Tip:
“Be sure not to over-powder! we are not pastries.You still want your skin to look like skin.”
Step 7: Voilà
Congratulations—you’ve *officially* got glowing, skin—own it.
BLEND YOUR FOUNDATION WELL!!
Obviously, the purpose of foundation is to make your skin look magically radiant and even-toned—not like it’s coated in an opaque, all-one-colour mask.
To keep things natural (i.e., your skin looking like skin), it needs to be blend in. This means applying your foundation—whether it’s a liquid, cream, gel or powder—and then making small circular motions or whatever motion is easy for you the idea is to blend well, with your tool of choice to gently blend the product into your skin. It should look and feel seamless as if it’s melted in instead of just sitting on top.
Let’s talk about the tools you can use:
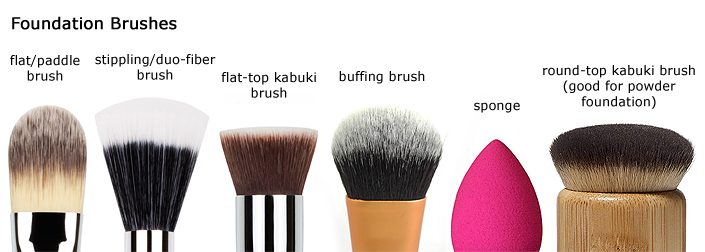
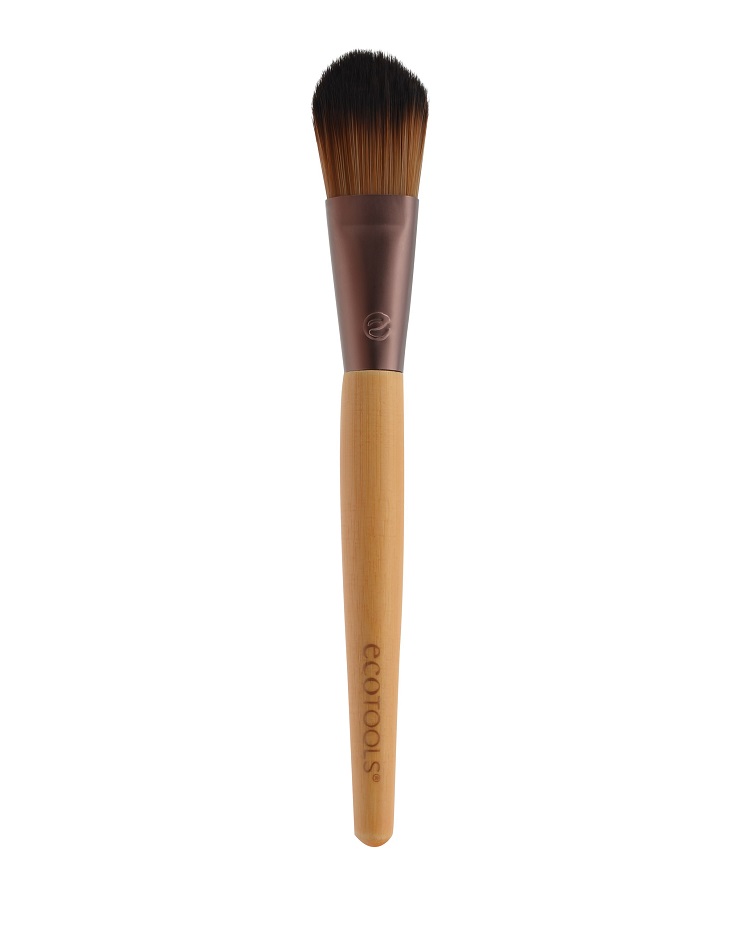
Flat foundation brushes: Require a skilled hand to “paint” on the product, otherwise you’ll be left with streaks or lines. My abilities with a flat brush extend only to using it to apply liquid foundation before then working it in with a buffing brush or a blender sponge. However, I’ve seen pros wield this brush alone to apply and buff in foundation—practice (and great lighting) makes perfect.
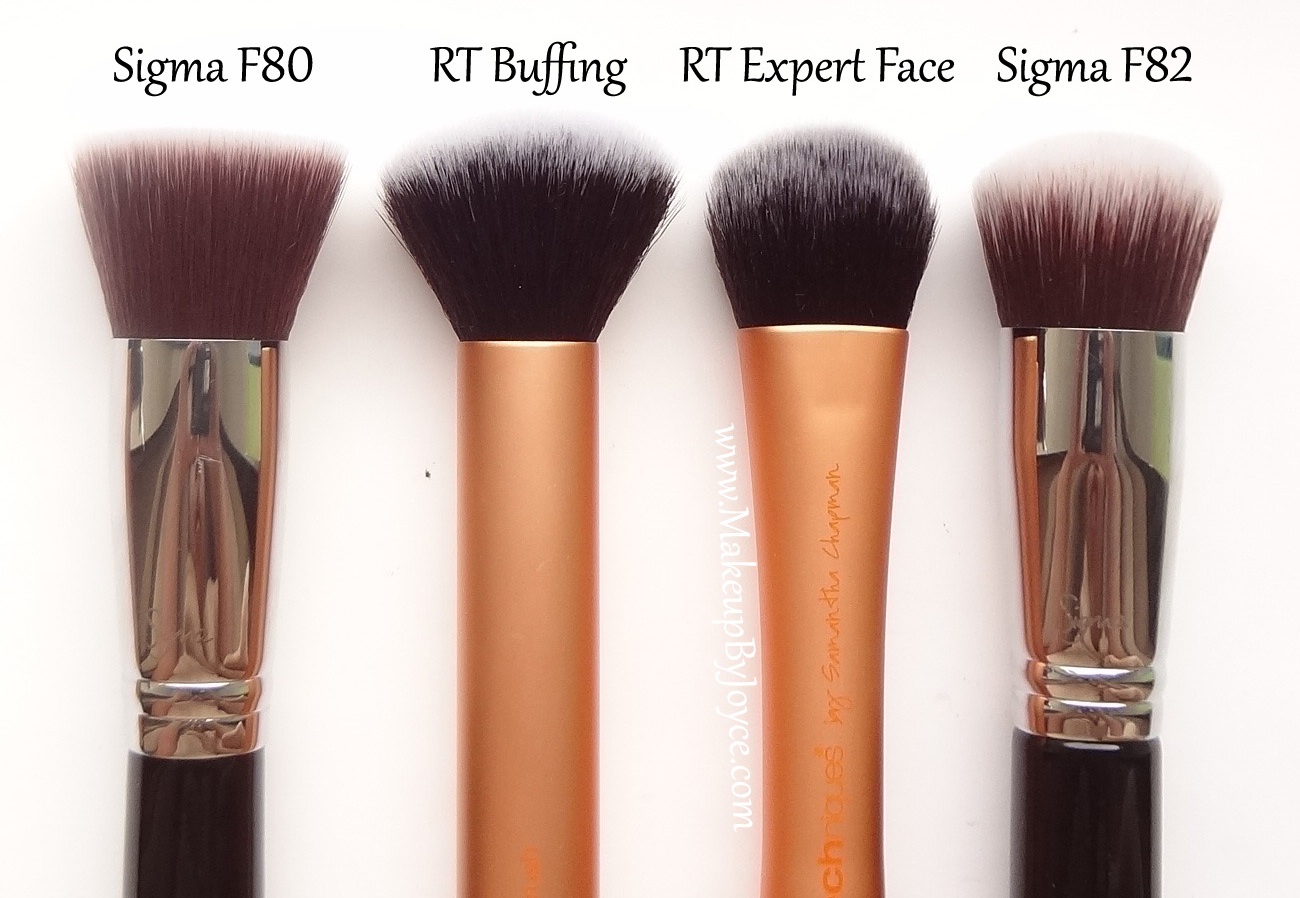
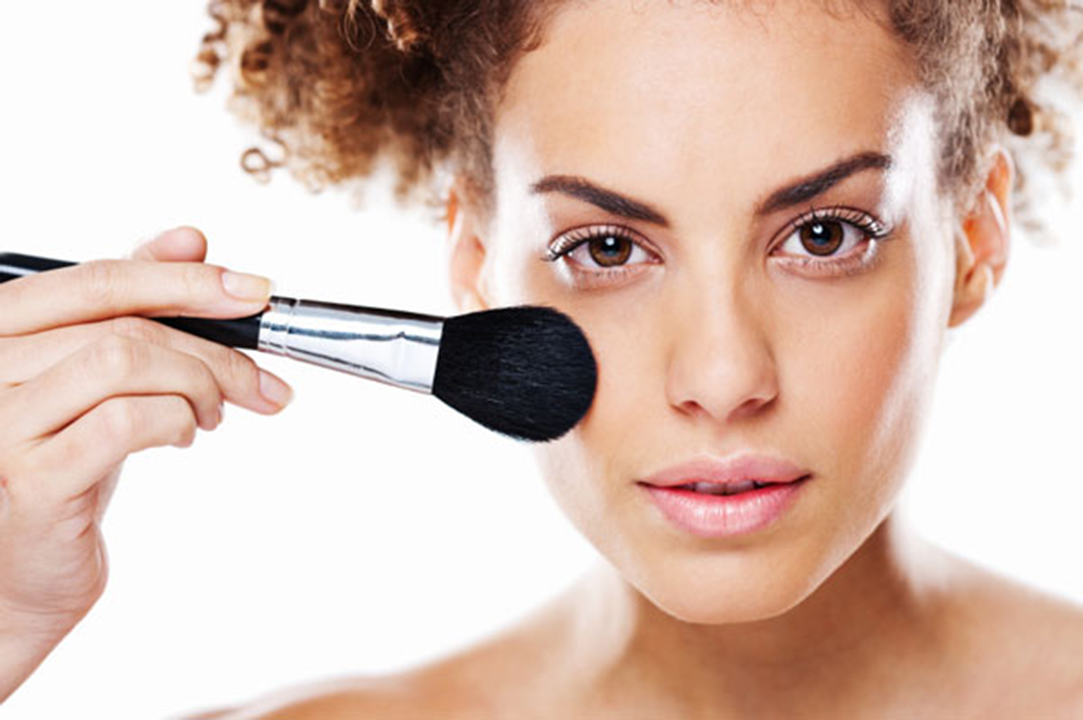
Buffing brushes: Have densely-packed bristles cut at an even length, which enables you to buff the product into your skin. Buffing brushes can work powders, liquids, creams and gels into the skin for an airbrushed effect. They do all the hard work for you—just gently swirl the brush over your face and watch your makeup blend beautifully. For extra coverage, try tapping the brush on your skin to add more product—you may not even need concealer!
Fingers: Great for cream products, since your body heat warms the product to help it blend easily into your skin. Your fingers are also good for hard-to-reach spaces, such as around your nose. Dab the product in a diamond shape on your face (forehead, cheeks, chin) and then use your index, middle and ring fingers to blend it into your skin, making small, circular motions. Maybe a good idea when you don’t have any other tool, I don’t favor this technique for the simple reason of cross contamination for the makeup and the skin especially skin with breakouts.
The Best Way to Apply Foundation Depending On Your Skin
from: http://stylecaster.com/beauty/best-way-to-apply-foundation-depending-on-your-skin/
Who doesn’t want perfect skin? Or at least what we perceive as perfect for us. When you splurge on a foundation that’s supposed to be life-changing and it doesn’t perform well, it’s natural you get frustrated. Your first instinct is probably to march right back to the store and return it, right? But just wait one second. Have you ever thought that maybe it’s not the foundation that’s the problem, but the way you’re applying it?
It’s obvious that not every foundation will work with every skin type. Just as you have to choose a product that works with your skin, you need to choose an application method that does the same. The way someone with oily skin puts on makeup won’t necessarily work the same for someone with dry skin. And with all the different types of brushes and sponges nowadays, the ways you can apply foundation seem endless. So what do you choose? A brush? A sponge? Or what about nature’s best makeup tool, your fingers? And not even that, what’s the best way to actually go about applying the product? Do you buff? Stipple? Swipe?
If you have dry skin, use downward strokes. Buffing in foundation may be tempting, but it can actually cause micro-exfoliation, which will lift the dead skin and emphasize any dry patches even more. Using downward motions with a paddle foundation brush will ensure that any flaky, dry skin lays flat and in the same direction.
If you have oily skin, there’s really no set way to apply foundation. If you deal with larger pores, it might be a good idea to use a brush or your fingers to press the foundation into the skin, rather than sweep it on. This will help “fill” the pores and make them less noticeable.
If you have acne prone skin, the most important thing is that whatever tool you use, it’s clean! This means cleaning your brushes after every individual use and steering clear of using your fingers (Even if you wash them, you’re still going to be handling products that carry germs). If you want maximum coverage, use a dense, round or flat-top brush and make sure you’re patting and blending the foundation into the skin, rather than sweeping or buffing. This will ensure that the foundation stays in one place and will keep the main concentration of coverage on your problem areas. With breakouts the bacteria involved actually is called strep! so you definitely should be conscious of this fact,contaminating the makeup for later use that won’t help you clear your skin is the other way around it will add to the exact opposite.
If you have mature skin, it will tend perhaps to lack moisture and elasticity. Try using a sponge, like the BeautyBlender, and make sure it’s damp. Wetting it beforehand will add moisture back into your skin while ensuring all the product doesn’t get soaked up. Pounce and roll the sponge on the skin for an even application.
How to Use a Foundation Brush
from: http://makeup.lovetoknow.com/How_to_Use_a_Foundation_Brush
Learning how to use a foundation brush can mean the difference between a completely flawless face and an unpolished look. Foundation application can be tricky for everyone, from novices to seasoned makeup aficionados. Blending it into dry spots, sliding it over oily skin and trying to cover those nooks and crannies can be quite a challenging task, but a foundation brush can make it easier, practice makes perfect.
Simple Steps for How to Use a Foundation Brush
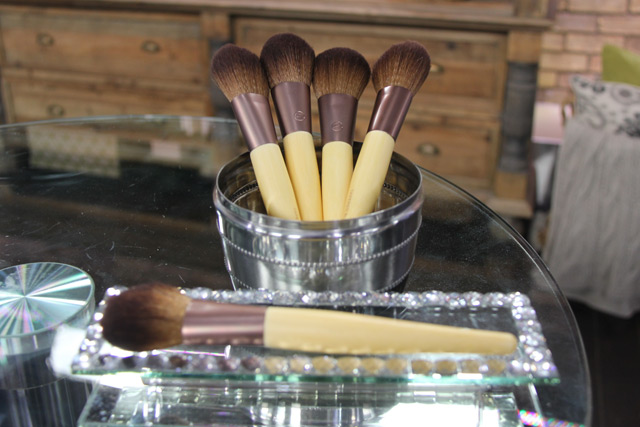
Alicia Silverstone Eco Brush
If you haven’t used a foundation brush before, it’s important to know the basics so that your makeup can be applied easily and flawlessly.
Preparing the Face
Before you begin the foundation application process, prep your skin so the foundation has a smooth and healthy canvas to adhere to.
Wash the face and gently pat dry with a towel until completely dry.
Apply a lightweight moisturizer onto the skin (this is important even if you have oily skin, in this case, you may choose a serum) and let dry for several minutes.
Apply a foundation primer to your skin if your type of skin is suitable for it. This can be done with a small foundation brush. Apply an even coat to the entire face and let dry completely.
If you need to add concealer to any problem areas or under the eyes, do so now, I prefer to use foundation in the correct tone so they get along better. Some concealers don’t really have the same consistency and it shows. A small foundation brush, concealer brush or even an eyeshadow brush make the ideal brushes for applying concealer. When applying concealer, always dab on and then blend.
Applying Foundation
Once your face has been prepped, it’s time to apply the foundation. Even if you’re a beginner, you’ll be able to follow these simple tips and create a smooth and even application.
Pour a small amount of foundation (assuming you are using a liquid) onto the back of your hand.( we prefer a palette that you can purchase at the art store or make your own)
Pick up some foundation with the brush or a small spatula so you don’t cross-contaminate. If you prefer light coverage, dip only one side of the brush in the makeup. If you want fuller coverage, use both sides of the brush to pick up the makeup.
Start applying the makeup in the center of the face so that you can blend outwards and avoid noticeable makeup lines.
Make sure to apply it even and blend down the chin to the neck and in the direction behind the ears you don’t have different shades a dead give away that this is not your skin, that defeats the purpose won’t you say?
Use the tapered edges of the brush to blend the makeup into those hard-to-reach areas, like the corners of the nose, corner of eyes, hairline and around the eyes and mouth.
Check for tiny makeup lines that are left behind after the foundation has set. If you see any of these lines, use a clean end of the foundation brush or a blender sponge and lightly blend these areas with small, circular motions.
If you’re using a cream or powder foundation, simply run the brush over the product in its container and follow the above steps. Several companies now offer brushes designed specifically for use with cream foundation, such as the CoverFX version available at Sephora. Its soft texture and short bristles allow for perfect application without streaking.
Caring for Your Foundation Brush
Once you know how to use a foundation brush, you’ll also want to take note of how to keep it clean. Cleaning all of your makeup brushes is imperative in order to keep them bacteria-free. Lingering bacteria not only poses the risk of causing acne breakouts, it also generally suggests that there is excess makeup building up on the brush.
Most high-end lines offer their own foundation brush cleaners I personally clean my brushes with 99% alcohol for a few reasons 1 that they dry very quickly 2 they get fully disinfected, 3 there is no water involved to get in the ferrule ( the metal part that connects the fiber hairs to the handle) that doesn’t dry and promotes bacteria and deterioration to the brushes I have brushes that I have used for over 40 years and they are in perfect shape . If you’re a frequent traveler, consider LBC Brush Shampoo by Sian Richards.
Perfect Application
By knowing how to properly apply foundation with a makeup brush, you can get the amount of coverage you want and flawless-looking skin. Practice the application steps until you’re comfortable, and your makeup will look professionally and beautifully applied every time.
The 9 Most Common Foundation Mistakes (and Exactly How to Avoid Them)
from:http://www.teenvogue.com/story/how-to-avoid-common-foundation-mistakes
You test it under the wrong light.
This is a huge deal when going to the makeup counter, the tendency is to try the products on the back of our hands!!!! well the color and texture of the skin there is very different than the skin on the face so it won’t tell you a true reading, not on color or the fish need it on your face, the next fact is that most stores have fluorescent lights which have a green hue and by that it won’t give you and accurate reading of the color you need, ask the salesperson if you can get a sample and if you can check it outside in natural daylight by that you will get an accurate reading on color and the texture that matches you, trust me you will be happy.
Not everyone has a Glam Room with proper selfie lighting built into their houses like Kylie Jenner, but good lighting does play an important role when picking the right foundation “Then there’s the yellow-ish bedroom or bathroom lighting you typically have at home that can make you think you need more foundation than you actually need.” Bring a mirror to a window to observe your makeup in natural light to make sure it matches your neck and body in tone and consistency.
You don’t use it with the right tools.
Navigating the makeup tools section at Sephora can be as confusing as calculus class. While a Beautyblender has recently proved to be the closest one-size-fits-all option we’ve seen in recent years, certain formulas truly shine if you’re willing to invest in the right tools. “However, if you need more coverage or help to even out your skin texture, a synthetic brush with a cream or liquid foundation might blend more easily for you. Then there’re powder foundations, which works best with a synthetic fiber or kabuki brush to buff it flawlessly onto your skin.” It’s all about nailing the perfect formula for your skin type, and figuring out if a brush, sponge.
You don’t switch your coverage with the changing weather.
You swap your skincare routine for the colder weather—the same should go for your foundation. “If you live someplace that experiences all four season, I recommend having a ‘winter’ foundation and a ‘summer’ foundation. Not only should you be thinking about how your skin color is darker in the warmer months thanks to the stronger sun, but humidity or dryness in the air also plays an important role,” says celebrity makeup artist Mai Quynh. In the winter, your dry skin might be craving coverage that’s more hydrating like a tinted moisturizer or liquid foundation, while powder formulas work well to counteract sweat and humidity during the spring and summer months.
You don’t throw out your foundation when you’re supposed to.
Not only is it possible for an ancient compact to be a petri dish of bacteria, but as foundation is exposed to air, it can dry out and change color. “Foundation can oxidize and get darker as it reacted with air. Now when I apply foundation I always put the product on the back of my hand and check the borders of the foundation after about 10-15 minutes,” says celebrity makeup artist Fiona Stiles. “If the borders are a shade or two darker than the center then I know the formula isn’t stable and I’ll use something different.”
You lay it on too thick.
“Apply makeup to your face based on the thickness of the supporting tissue. This means the lightest and thinnest application of makeup should be where the skin itself is the thinnest—for example, your forehead, around the eyes and bridge of the nose,” says French. “Use a heavier application of foundation on the thicker areas of the face (cheeks, nostrils, upper lip, chin, and jaw) where more coverage may be required because the skin structure can better support a more opaque product.” If you’re using a liquid foundation, try placing a couple of drops on the back of your hand or on a palette instead of directly on the sponge or brush to control the amount of makeup you apply on your face.
You use it to cover your pimples.
It’s tempting to double up on foundation on zits when the formula looks similar to that of a concealer. “But using an ultra-thick layer of foundation to cover up imperfections just ends up appearing cakey, dry and sits in your pores and lines,” says celebrity makeup artist Charlotte Tilbury. “Instead of masking zits and pimples with a heavier layer of foundation, target imperfections with a concealer that is designed to reflect light in a flattering way. Concealers have greater pigment than foundation so you can spot treat certain areas that need more attention and coverage without cakiness.”
You don’t blend your foundation past your jawline.
When it comes to makeup, there isn’t a word in the English language that’s more important than “blend.” “The space around your jaw and neck are usually overlooked, and blending those areas are particularly the key to a seamless look. You don’t want it to look like your neck and face are two entirely different colors and textures,” says Tilbury. “And of course, blending foundation across the cheek area and tricky places like around the eyes, nostrils and mouth are important, too.”
You don’t set it correctly.
A light dusting of finishing powder is great, but if you’re not careful, it’s easy to make skin look dry and settle into fine lines. “Plus, a powder can leave a ghostly white reflection in flash photography that’s a no-no for your selfies. Instead, try a makeup setting mist like e.l.f. Mist & Set, which not only hydrates your skin in dry, cold weather, but it reactivates your foundation throughout the day without having to apply a fresh layer of coverage,” says e.l.f. global artistic director Achelle Dunaway.
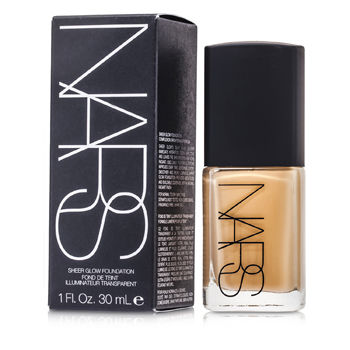
NARS Sheer Glow Foundation
- A sheer makeup that provides buildable coverage
- Helps even out skin & impart a glowing, satin-finish
- Contains skin care benefits & NARS Complexion Brightening Formula
- Improves skin brightness & texture with daily use
- Fortified with powerful anti-oxidants to fight against free radical damage
- Makes skin softer, smoother & hydrated
- Suitable for normal, normal-to-dry & dry skin types
- Dermatologist tested, non-comedogenic, fragrance-free
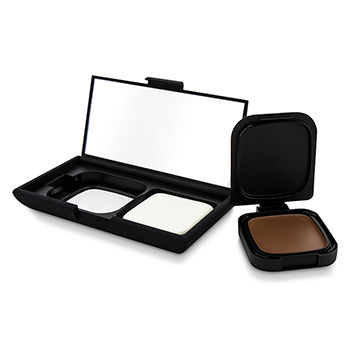
NARS Radiant Cream Compact Foundation (Case + Refill)
- Creamy, lightweight compact makeup
- Advanced Emulsion technology formula allows for wet or dry application
- Provides medium & buildable coverage
- Blends well with skin to boost radiance
- Moisture content makes skin feel soft & comfortable
- Reduces the appearance of fine lines & wrinkles
- Leaves you a smooth & luminous complexion
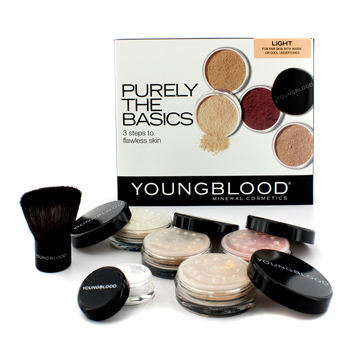
YOUNGBLOOD Purely The Basics Kit
- Purely The Basics Kit – #Light:
- 2 x Natural Mineral Foundation 3g/0.1oz (#Ivory, #Neutral)
- 1 x Crushed Mineral Blush 3g/0.1oz (#Sherbet)
- 1 x Mineral Rice Setting Powder 3g/0.1oz (#Light)
- 1 x Mini Size Kabuki Brush
- 1 x Hi Definition Hydrating Mineral Perfecting Powder Sample 5g/0.02oz (#Translucent)
- Ideal both for personal use & as a gift
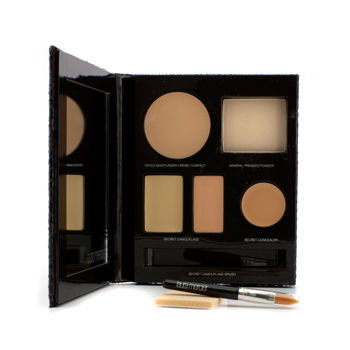
LAURA MERCIER The Flawless Face Book
- The Flawless Face Book – # Nude:
- 1x Tinted Moisturizer Creme Compact SPF 20 2.5g/0.08oz (# Nude)
- 1x Mineral Pressed Powder with Double Sided Sponge 3.8g/0.12oz (# Real Sand)
- 1x Secret Camouflage 4.61g/0.16oz (# SC2)
- 1x Secret Concealer 1.2g/0.04oz (# 2)
- 1x Travel Size Secret Camouflage Brush
- Ideal both for personal use & as a gift
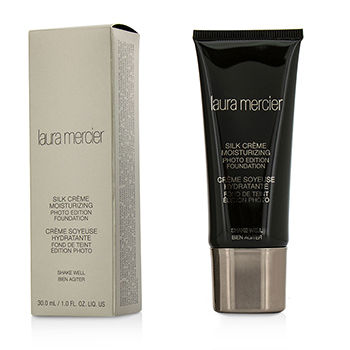
LAURA MERCIER Silk Creme Moisturizing Photo Edition Foundation
- A rich, creamy, hydrating foundation
- Provides long lasting full coverage for up to 12 hours
- Effectively hides wrinkles, lines, blemishes & other imperfections
- Velvety texture & comfortable to wear
- Leaves a smooth, luminous & flawless complexion
- Perfect for video, photography & special events
